
Microsoft Azure tutorial. Despite the fact that WordPress now runs almost a quarter (23.5%) of all websites, it’s still not a perfect CMS to scale up for enterprise-level sites driving a massive amount of traffic. As a general rule, we prefer to make use of various caching plug-ins to maximize the performance of our WordPress sites but when it comes to an enterprise-grade site, these plug-ins seem to be failing.
Usually, to manage a high-traffic WordPress site, we purchase an affordable, secure and high-performing virtual dedicated server. But again the same thing occurs: you could not rely solely on a cheap virtual private server to cope with a huge traffic spike. That’s where the Microsoft Azure shows its true magic.
After reading this post, you’ll learn:
- Microsoft Azure: What is it?
- How to Deploy Scalable WordPress on Azure Websites
- Best Practices to Speed up WordPress on Azure Websites
Let’s get familiar with Microsoft Azure!
Microsoft Azure: What is it?
Microsoft Azure, formerly known as Windows Azure, is an extremely flexible and highly recognized enterprise-level cloud platform that gives you the ability to build, deploy and manage integrated services and applications in the cloud. Not only it offers fully managed PaaS (platform-as-a-service) and IaaS (infrastructure-as-a-service) services but also supports a wide range of programming languages, operating systems, tools, technologies and frameworks, including both Microsoft-specific ones and third-party ones. Being enormously scalable, economical and flexible, Azure lets you do more while investing less time and money.
One of the most interesting things about Azure is that it enables users to create, configure and optimize an enterprise-grade WordPress site in a couple of minutes. Azure Websites, a web hosting service under Azure, makes it possible for you to set-up a secure, scalable and optimized WordPress installation using a pre-configured web application called Scalable WordPress available on the Azure Marketplace. After installing WordPress on Azure Websites, when you access your site’s dashboard, you find yourself powered with a predefined set of various optimization techniques and some handy plug-ins such as Jetpack, Azure Storage etc, which help you maximize the performance of your WordPress site.
Below are some unique features that make Azure Websites stand-out from other WordPress hosting providers:
- Offering user-selected placement in one or multiple Microsoft-managed datacenters globally.
- Supporting custom domain and SSL connections.
- Allowing you to use a higher-end MySQL or Microsoft SQL database.
- Availability in four service tiers – standard, basic, shared and free.
- Guaranteed 99.95% uptime for basic and standard tiers customers.
- Facilitating authentication with Azure Active Directory to provide an additional layer of security.
- Letting you automatically or manually geo-route incoming user traffic to your site using the Traffic Manager for better performance and availability.
- Enabling you to continuously monitor site metrics such as HTTP errors, CPU time etc and set up real-time alerts.
- Letting you trace failed request and collect log data for tracking and troubleshooting with Visual Studio
- Backing up your website and database automatically.
- Enabling you to set up multiple private environments, such as testing and staging, for your websites.
- Hosting websites on IIS (Internet Information Services), an easy-to-manage web server running on Windows Server 2012.
Although the Azure Websites service is developed especially to entice enterprise level users, but it’s also ideal for businesses, creative agencies and web developers. It’s indeed a great attempt by Microsoft to capture business from enterprises by offering them a more scalable and secure WordPress hosting environment. Just like, on the contrary, WPEngine, MediaTemple, Pagely and Pantheon do by offering a fully managed WordPress hosting service.
How to Deploy Scalable WordPress on Azure Websites
After getting acquainted with Azure Websites and its sizzling features, let’s walk through the steps to be followed for running a robust enterprise-class WordPress site on it.
Sign-up For a Free Trial Account:
The very first thing you’ll need to do for creating a WordPress site with Azure is to create a free trial Azure account, which offers you $200 credit to test out all Azure services. The free trial is available for one month, while the registration process requires you to have a Microsoft account. On registration, you’ll be asked to enter and verify you mobile number via call or text message.
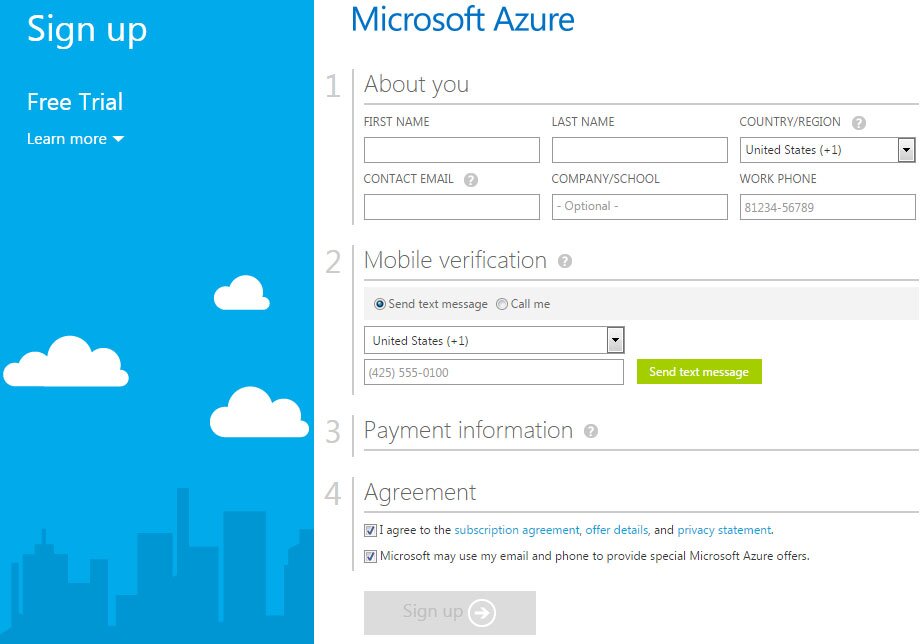
As well, you’ll also need to enter your credit card information there. However, credit card details are required for verification purposes only and you’ll not be charged any money to avail this offer.
Get into the Azure Management Portal:
Once you’ve signed up, you’ll see a link on your screen taking you to Azure Management Portal, where you can set up your first service.
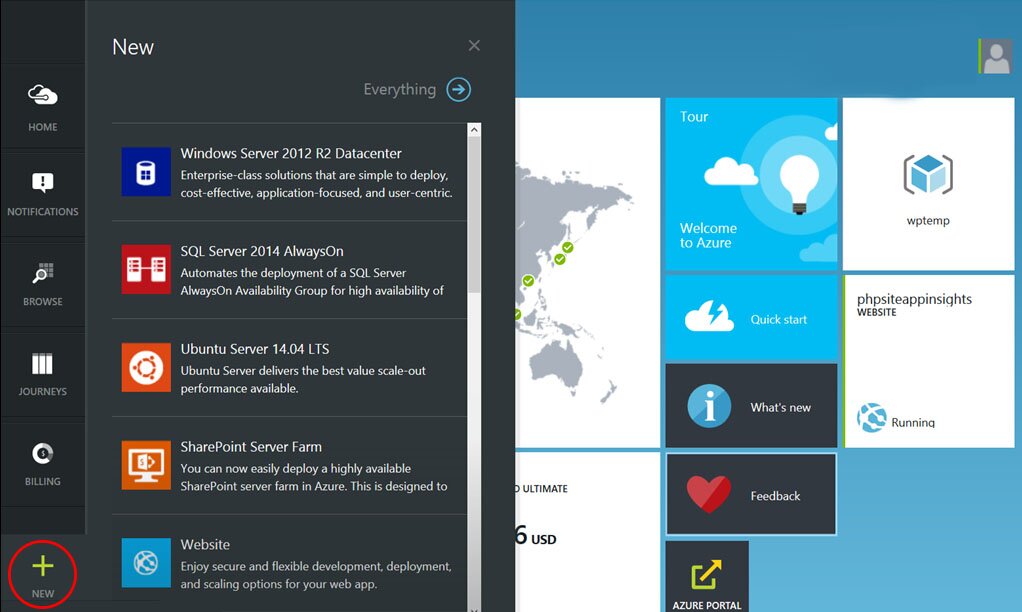
Click on the +New icon given in the bottom left corner of the portal. You’ll be then taken to a new screen which looks like:
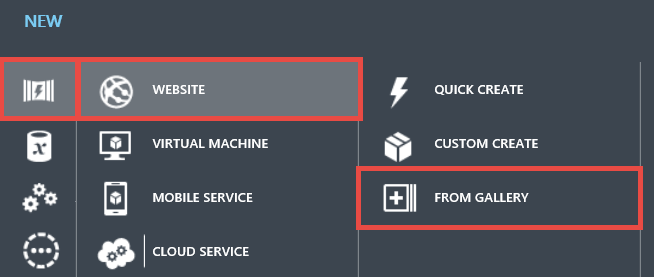
Click the Website icon and then select From Gallery option. A dialog box titled Add Web App will open where you can find various categories having a number of apps available for Azure.

Click CMS and then scroll down to select WordPress from the given list. When you click WordPress, you’ll be able to see WordPress-related information like latest version, size and release date on the right side of the dialog box.
Click the Next arrow and you’ll be presented with the Configure Your App page, where you’ll be asked to enter your site’s URL, select values for Database and Web-scale Group fields and set-up some other things under Deployment Settings.
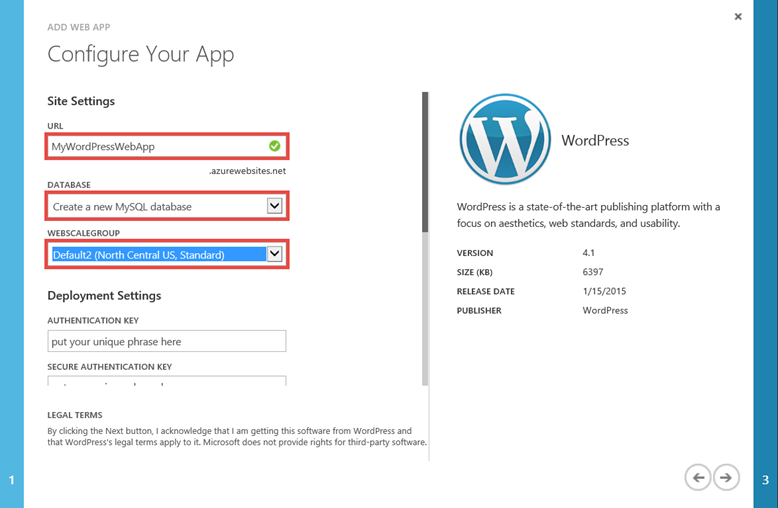
So here we enter a unique URL name for our site, select Create a new MySQL database in the Database field and a suitable web scale group from the drop down list.
Clicking the Next button will take you to the Create New MySQL Database page, where you’ll have to provide a unique name for your new database and choose a region to deploy the database to. To improve website’s performance and reduce the network latency, I highly recommend you to keep the database deployment region closet to the hosting region.
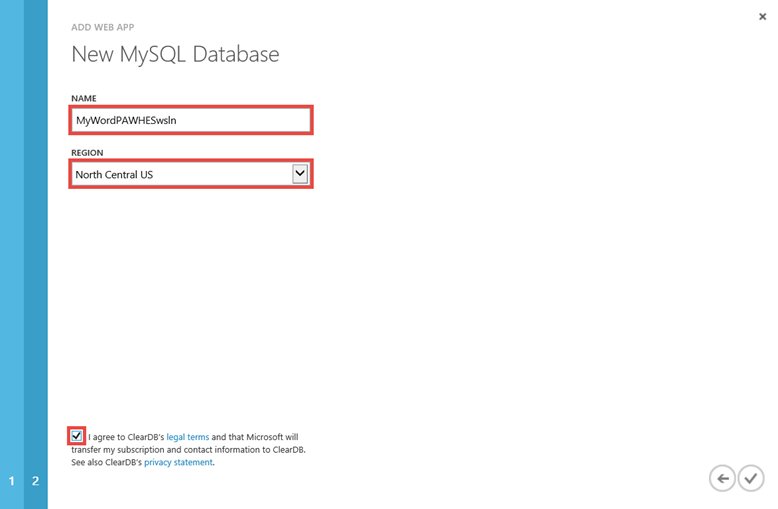
Tick the box given at the bottom of the screen to accept ClearDB’s legal terms and click the Check button to end the site creation process.
Now at the bottom of the Websites page, you’ll see the status of various build and deploy operations initiated by Azure. After the completion of all operations, a final message saying your site has been deployed will be displayed on the same page.
Launch your WordPress site:
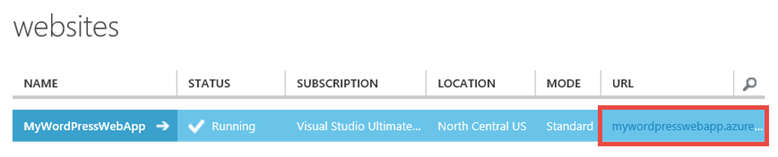
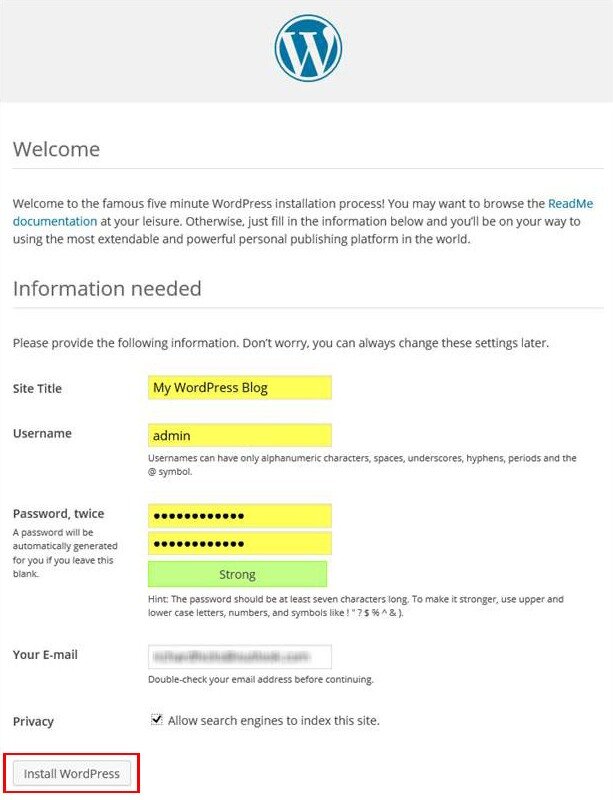
On the Websites page, click on the URL of your new WordPress site and you’ll find yourself on the Welcome page, where you’ll be asked to provide essential configuration details like site title, username, password etc. Enter required information, tick the checkbox if you wish to allow search engine to index your new site and finalize configuration by clicking Install WordPress.
After a few seconds, you’ll get a success message saying WordPress has been successfully installed.
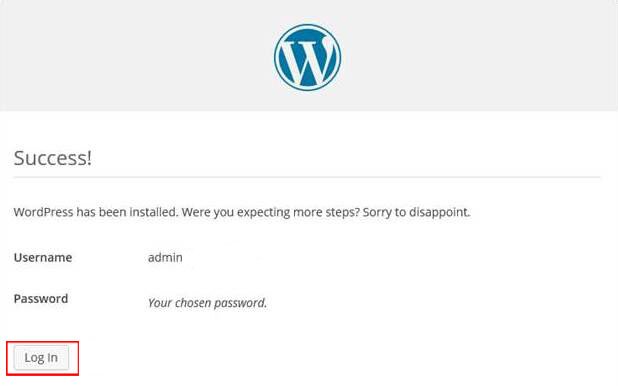
By clicking the Log In button given on the Success page, you’ll be able to login to your new WordPress site with the username and password that you entered on the Welcome page.
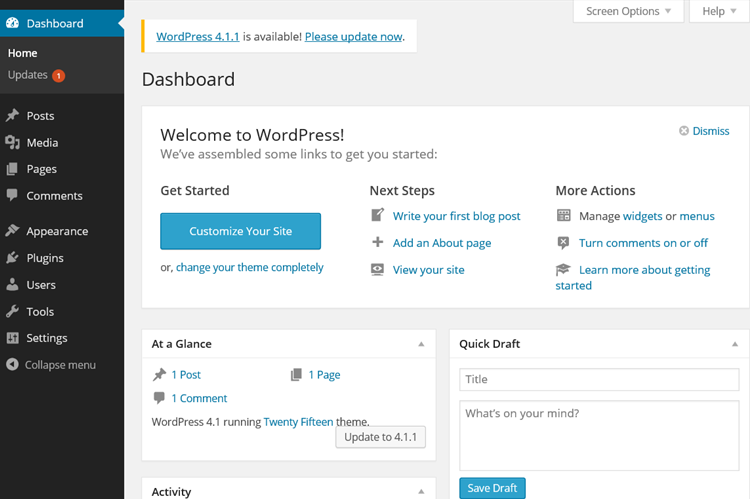
That’s all! Now you can configure your site to fit your taste by clicking the Customize Your Site button shown in your site’s dashboard.
Best Practices to Speed up WordPress on Azure Websites
Once your WordPress site is up and running on Azure Websites, you need to implement following easy and quick practices to make sure your site will load blazing fast.
Keep Both Database and Website in the Same Datacenter:
As I’ve mentioned earlier, locating the website in the same datacenter as the database plays a vital role in reducing the network latency that often slows your website down. If the components of your website and database are available in the same data center, your website will not need to go around the globe to make a database call, which will result into increased page load time.
Optimize and Clean up Database:
No doubt WordPress auto-save feature is quite useful, but sometimes it seems to have a negative impact on your site’s speed especially when the size of your database is limited. As it automatically saves everything, including post revisions, pingbacks, trackbacks, trash items and comments, to your website’s database, you may hit the storage size allocated soon if the database is not being cleaned up on a regular basis. To automatically optimize and routinely clean up your database, you can use WP-Optimize plug-in.
Minimize HTTP Requests:
The more HTTP requests your website makes, the more time it will take to load. By combining all of your style sheets into one CSS file and putting all JS into on JavaScript file, you can reduce the number of dependent requests a browser makes while loading the website. For this purpose, you can take advantage of Better WordPress Minify plug-in. Furthermore, if your site is using third-party services, it would be considerably more efficient to make them available locally.
Optimize Media Content:
If your WordPress site is media heavy, chances are it will load too slowly. In this case, you can do a couple of things mentioned below:
- Keep All Your Media Content in the Azure Storage: Use Azure Storage plug-in to store any new media content to Azure Storage, instead of directly uploading it to your website’s directory. As well, you can try Azure CDN to reduce bandwidth usage.
- Compress Images: Before uploading your images to the media library, compress them to a smaller size. For automatic compression of your images before upload, you can make use of WP Smush.it.
- Specify Dimensions of Your Images: Specifying the dimensions of your images, you help the browser to quickly figure out the layout of the web page to be loaded, which can speed things up to a great extent.
Set-up Caching
If you’re expecting a surge in your website’s traffic, consider adding some caching method to your WordPress site to prevent crashes. To produce static HTML files, you can either configure IIS Output Caching or can use WP Super Cache caching plug-in. To learn how to configure WP Super Cache on IIS, click here.


