No matter what’s the basic purpose of your website, if you’ve equipped it with a fully-functional Javascript slideshow, you’ve reduced the gap between your business and the targeted customers. As an incredible way of displaying lots and lots of information within a relatively small space, the Javascript slideshows have served as great add-ons for web pages. If these details have enticed you for the creation of your very own slideshow(with sliding panels) using Javascript, then you’ve landed on the right tutorial. Here, I’ll be sharing with you some easy-to-follow steps for creating a Javascript slideshow.
Understanding the flow of steps within the Javascript slideshow creation process
In this tutorial, I’ll be using simple HTML and CSS for creating the slideshow where the sliding functionality would be created using jQuery Javascript library. I’ll be also be using two popular plugins viz: LocalScroll and ScrollTo for providing the underlying effects within the javasrcipt slideshow. While the former plugin lets the anchors to jump the slideshow to an accurate slide as per the targeted ID, the latter one offers an excellent sliding functionality which transitions the slides instead of simply jumping from one to another.
Since we’ll be keeping the basic accessibility parameter in mind while building the slideshow, every user will be able to navigate and view the slides even when the Javascript option has been turned off.
Here’s a look at the HTML structure for the slideshow:
<!DOCTYPE html>
<html lang="en">
<head>
  <meta charset="utf-8" />
  <title>Sliding-enabled slideshow using jQuery | Script Tutorials</title>
  <meta name="description" content="Sliding-enabled slideshow using jQuery demo - Script Tutorials">
  <!-- include to stylesheet -->
  <link rel="stylesheet" href="css/style.css" type="text/css" />
  <!-- include jQuery library and other javascripts -->
  <script src="https://ajax.googleapis.com/ajax/libs/jquery/1.11.3/jquery.min.js"></script>
  <script src="js/jquery.scrollTo.js"></script>
  <script src="js/jquery.localscroll.js"></script>
  <script src="js/custom-scripts.js"></script>
</head>
<body>
  <div id="slideshow">
    <!-- List of slider images -->
    <ul>
      <li id="slide1"><img src="images/slide1.jpg" alt="Slide 1" /></li>
      <li id="slide2"><img src="images/slide2.jpg" alt="Slide 2" /></li>
      <li id="slide3"><img src="images/slide3.jpg" alt="Slide 3" /></li>
      <li id="slide4"><img src="images/slide4.jpg" alt="Slide 4" /></li>
      <li id="slide5"><img src="images/slide5.jpg" alt="Slide 5" /></li>
    </ul>
  </div>
  <div id="slideshow-nav">
    <!-- Navigation list of slider images -->
    <ul>
      <li><a href="#slide1">Slide 1</a></li>
      <li><a href="#slide2">Slide 2</a></li>
      <li><a href="#slide3">Slide 3</a></li>
      <li><a href="#slide4">Slide 4</a></li>
      <li><a href="#slide5">Slide 5</a></li>
    </ul>
  </div>
</body>
</html>
On observing the above code carefully, you’ll find that the HTML for demo pages begins with Doctype, title and a link to the CSS stylesheet. After this, the two plugins(already explained above), jQuery library and the empty scripts.js file can be linked together so as to get the slideshow up and working.
HTML which forms the slideshow has been split into two sections viz: a div with ID of slideshow and other with ID of slideshow-nav. Here, it is vital to note that the slideshow div will include an unordered list of linked images, <li> tag with an ID which corresponds to the slideshow-nav anchors.
Now, let’s have a look at the CSS styling:
css/style.css
#slideshow {/*slider container css*/
  width: 800px;
  height: 400px;
  overflow: hidden;
  margin: 50px auto 50px auto;
  box-shadow: 0px 0px 50px #333;
  -moz-box-shadow: 0px 0px 50px #333;
  -webkit-box-shadow: 0px 0px 50px #333;
}
#slideshow ul {/*manage slider scroll elements css*/
  width: 4000px;
  list-style: none;
}
#slideshow ul li {
  float: left;
}
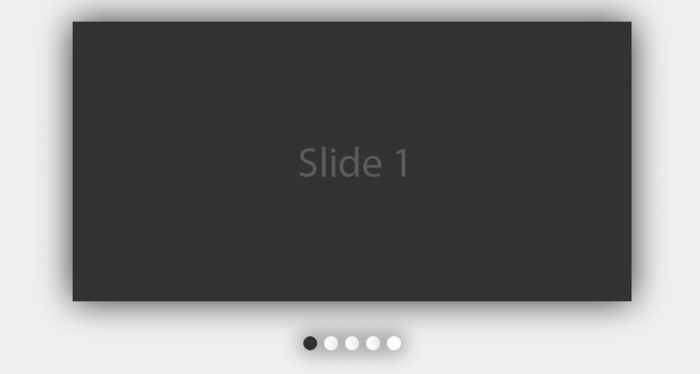
The above CSS will style each page into something more like a slideshow. Starting with setting the height and width of slideshow to the dimensions exactly similar to those of the image slides. With each slide floating side by side, the total width of unordered list scales up to 4590px. Also, I’ve used the overflow property for preventing the multiple images to run across the entire page. Here, all you need to do is simply set the overflow property to overflow: scroll; making the slideshow work even in the lack of Javascript.
Next, a cool shadow is being added using CSS3-box shadow as shown below:
#slideshow-nav {/* Slider navigation container css */
  width: 150px;
  margin: 0 auto 100px auto;
}
#slideshow-nav ul {
  list-style: none;
}
#slideshow-nav ul li {
  float: left;
}
#slideshow-nav ul li a {/* navigation styling css */
  display: block;
  width: 20px;
  height: 20px;
  float: left;
  margin: 0 5px;
  background: #fff;
  text-indent: -9999px;
  border-radius: 50%;
  -webkit-border-radius: 50%;
  box-shadow: 0px 0px 30px #000;
  -webkit-box-shadow: 0px 0px 30px #000;
}
#slideshow-nav ul li a:hover, #slideshow-nav ul li a.active {
/* hover and active navigation css */
  background: #333;
}
Here, if you observe carefully, the slideshow-nav div is being moved into a position that is under the main slideshow section. Also, we don’t want multiple buttons which don’t work under a situation where Javascript has been enabled. You can use visibility: hidden; for hiding these buttons on a default basis, making them visible at a later point of time. It might also interest you to know that anchors of each navigation list are being transformed into circular buttons with the help of CSS3 border-radius, with the default text being shifted off screen using negative text-indent.
So far the slideshow is visible in its working state even without Javascript. There is just a scroll bar which allows the user to move back and forth between multiple images.
Finally, let’s have a look at the jQuery functionality
js/custom-scripts.js
$(document).ready(function() {
  var slider = $("#slideshow");
  var slider_nav = $("#slideshow-nav");
  slider_nav.find("a[href=#slide1]").addClass("active");
  slider_nav.localScroll({
    target:'#slideshow',
    axis: 'x'
  });
  slider_nav.find("a").click(function(){
    slider_nav.find("a").removeClass("active");
    $(this).addClass("active");
  });
});
If you look at the above code, you’ll find the slideshow div’s CSS has been changed from overflow: scroll; to overflow; hidden; in order to remove the scrollbar. After this, the visibility of nav buttons has been set to visible with an ‘active’ class being automatically added to the very first button. Both the plugins viz: LocalScroll and ScrollTo are now being activated, with the localScroll functionality being applied to the slideshow-nav items, guiding them to target slideshow items by simply moving along the X-axis.
Finally, in order to ensure that all the buttons within the slideshow light up with their relevant active class(whenever clicked), we’ll be using a simple jQuery rule which would remove the active class from different buttons. This particular active class would then appear within the CSS stylesheet for rendering a grey background color to the respective button. Running a quick test in the browser will reveal the entire javascript slideshow working in its best possible manner.
That’s it!
Output:
Live Demo
[sociallocker]
download in package
[/sociallocker]
Conclusion
So that was all about creating an eye-catchy Javascript slideshow that can add a brilliant amount of visual appeal and elegance into your dull, boring web pages.


