
Create the simple Listview application in Android. In last few years Android has taken the Tech World by storm. It is running on billions of devices and presents a great opportunity for professionals to innovate using this amazing technology. This project will be divided into 3 important parts: Android Installation, Creating a Hello World program and Creating a ListView Program
1) Let’s learn the android installation process:
- System requirements for Windows:
- Microsoft® Windows® 8/7/Vista/2003 (32 or 64-bit)
- 2 GB RAM minimum, 4 GB RAM recommended
- 400 MB hard disk space
- At least 1 GB for Android SDK, emulator system images, and caches
- 1280 x 800 minimum screen resolution
- Java Development Kit (JDK) 7
- Optional for accelerated emulator: Intel® processor with support for Intel® VT-x, Intel® EM64T (Intel® 64), and Execute Disable (XD) Bit functionality
- Visit the given link http://developer.android.com/sdk/index.html
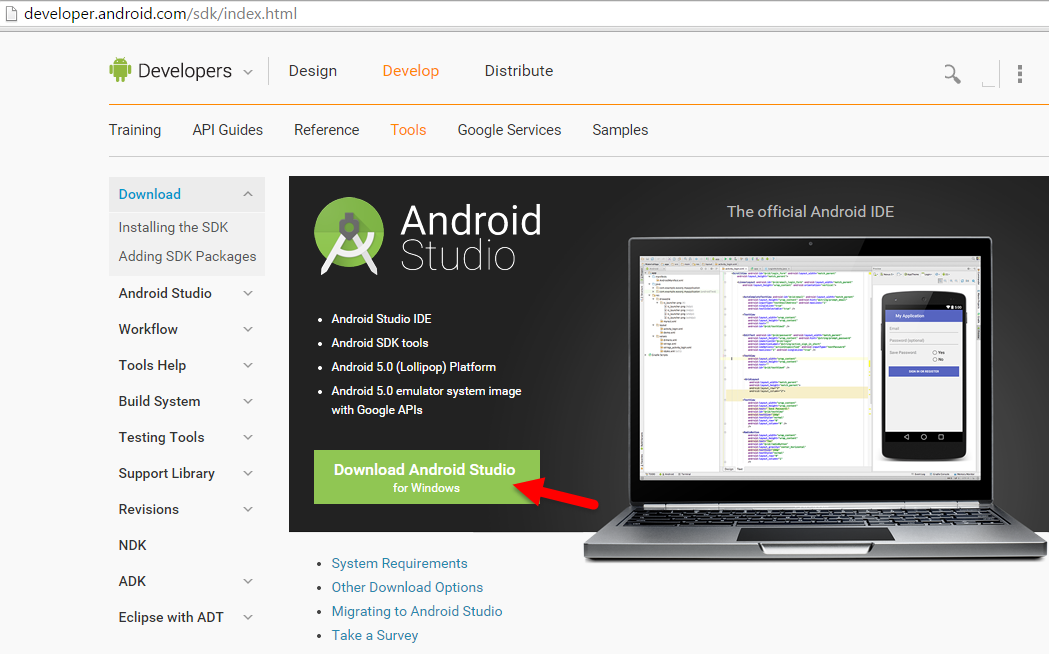
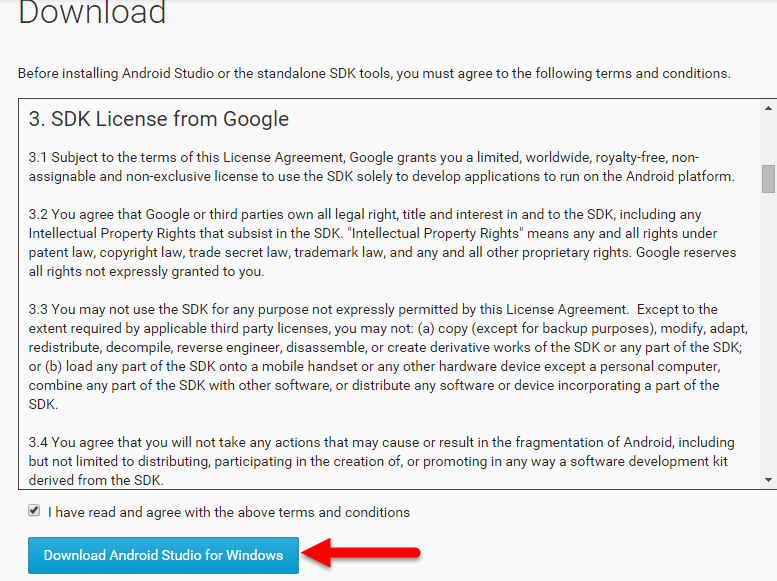
- Just click on the Download Android Studio button as shown above and accept the terms and conditions.
- Now click the download button and it will download Android Studio for you.
- Now double click on the downloaded file and install it in your machine.
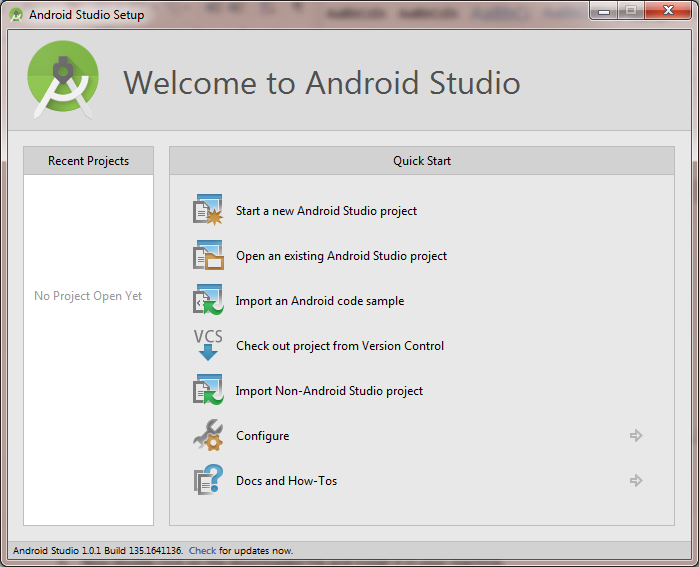
- Once it gets installed it will display Welcome screen of Android Studio as shown below:
Now you have finished installation, now let’s move to next step
2) Creating a Hello World Program
- So, let’s create a new Android Studio project.
- Select Start a new Android Studio Project and a New Project Screen will get launched
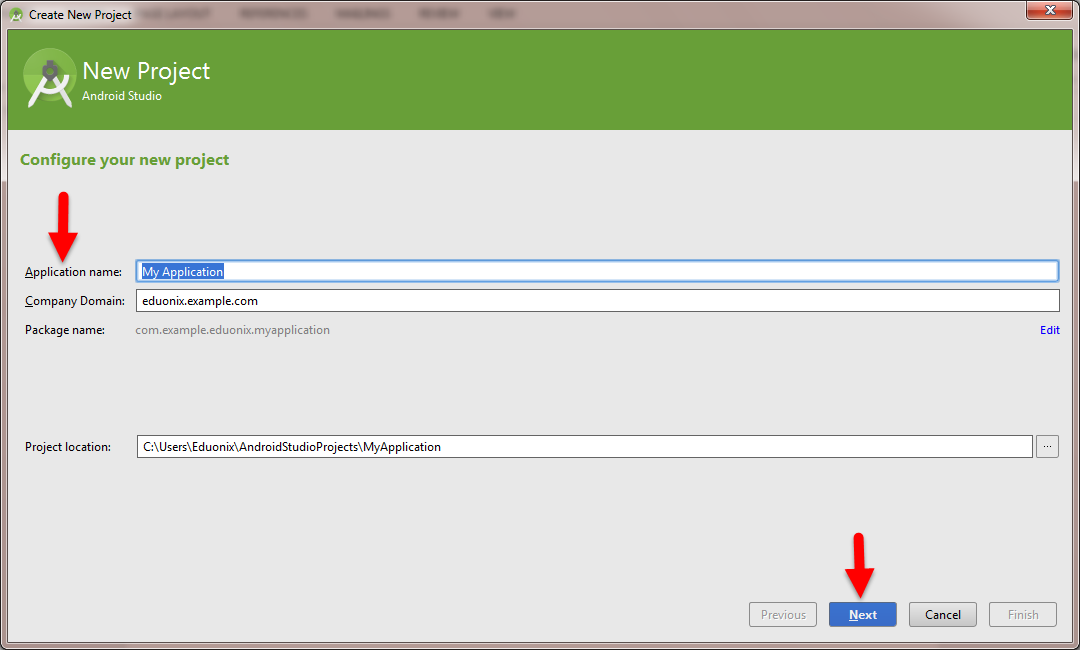
- Now enter your Application name and click on Next
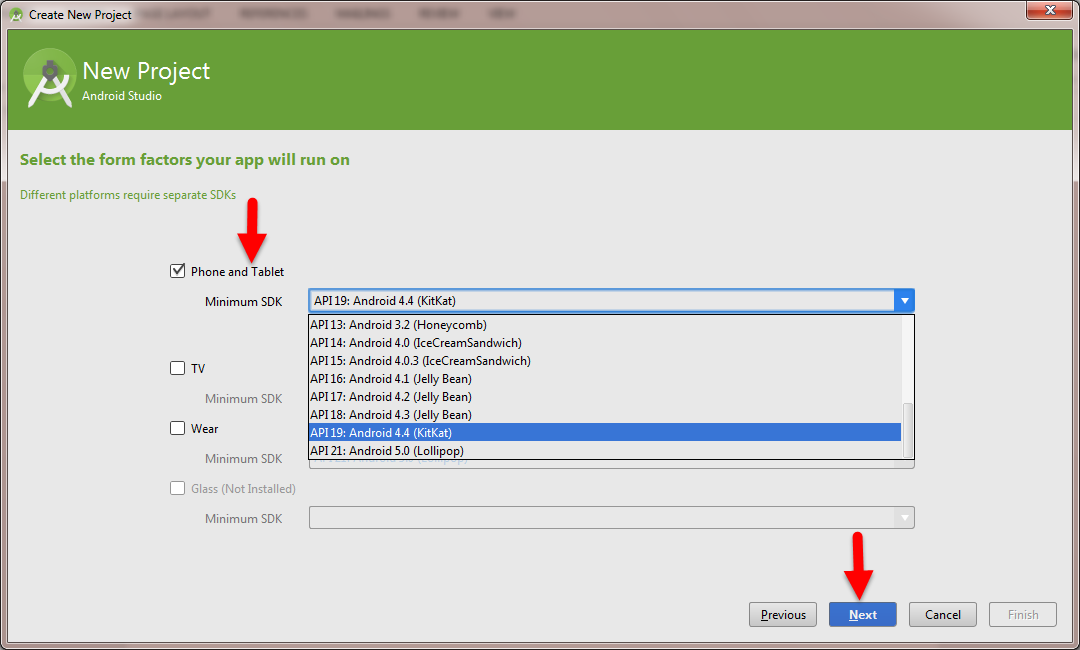
- Select the minimum required SDK from the list and click the Next button
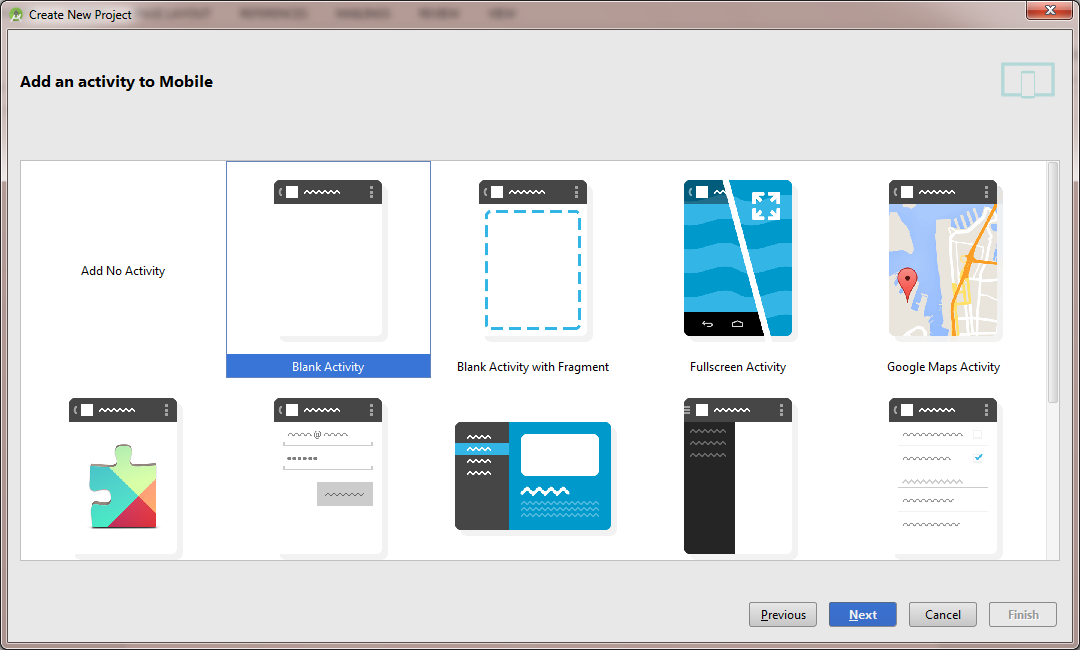
- After clicking the Next button Add Activity Screen will be displayed
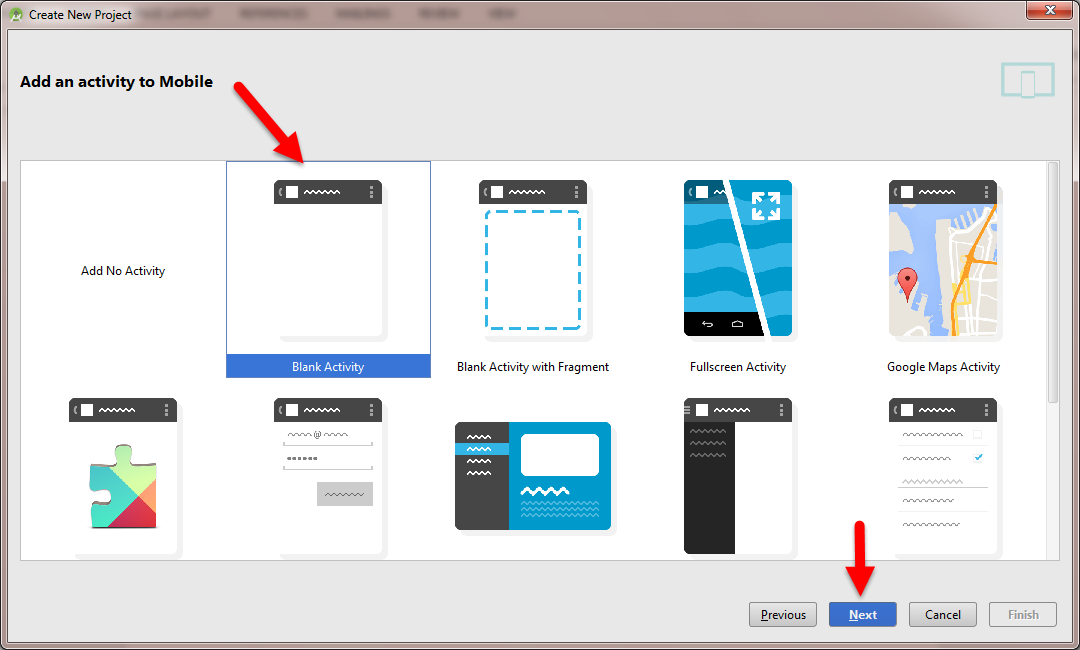
- Select the required Activity Screen and click on the Next button:
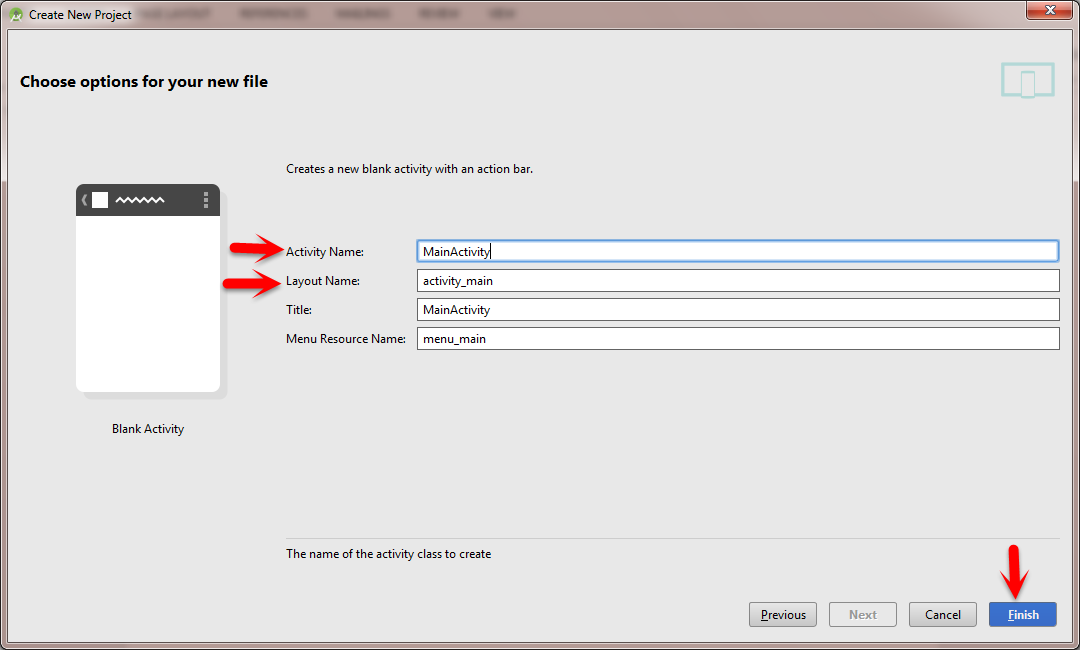
- Here is the window for your Activity creation with your Activity Name and Layout Name.
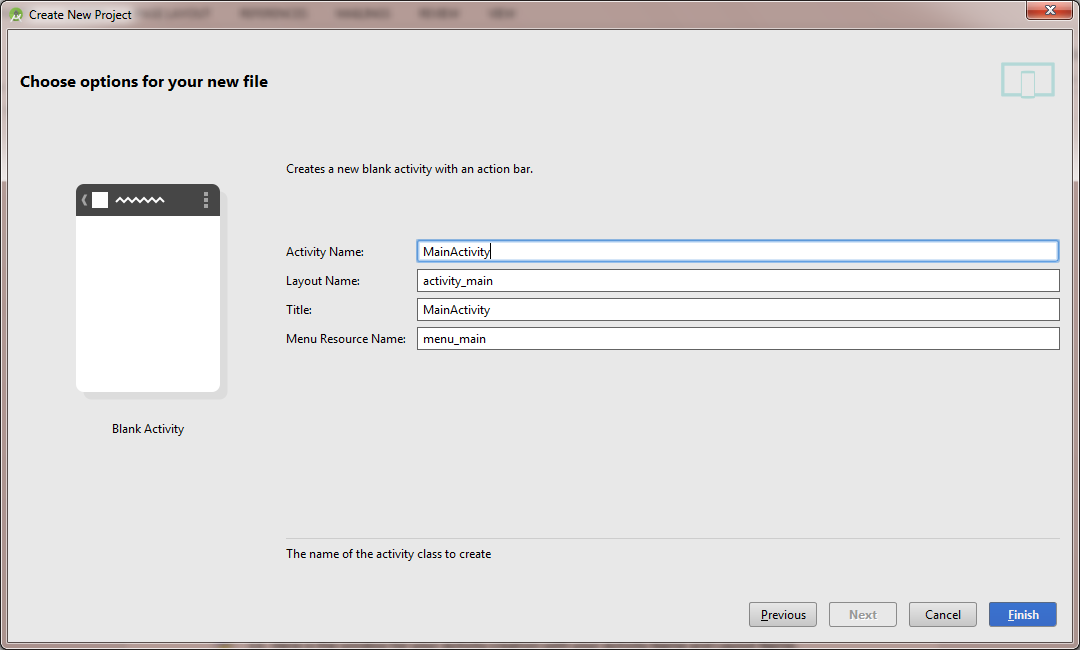
- Activity Name is your Java class name and Layout Name is your Xml file name.
- You can change the respective file names in this window and once done with the changes click on the Finish button available at the bottom-right corner.
- After clicking the Finish button Android Studio will start loading your project as shown below:

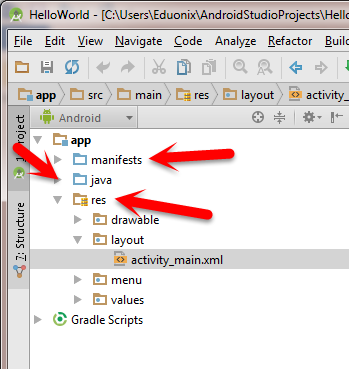
- Once its finished loading your project will get created :
- There are three important folders in the project which are Java, res, manifest.
- Java folder consists of your java classes, res folder consists of drawable folder layout folder values folder where the layout folder consists of your xml files.
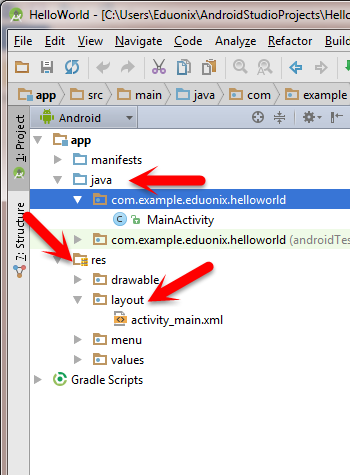
- Whenever you create a new java class it is created under the java folder and your new xml file is created in your layout
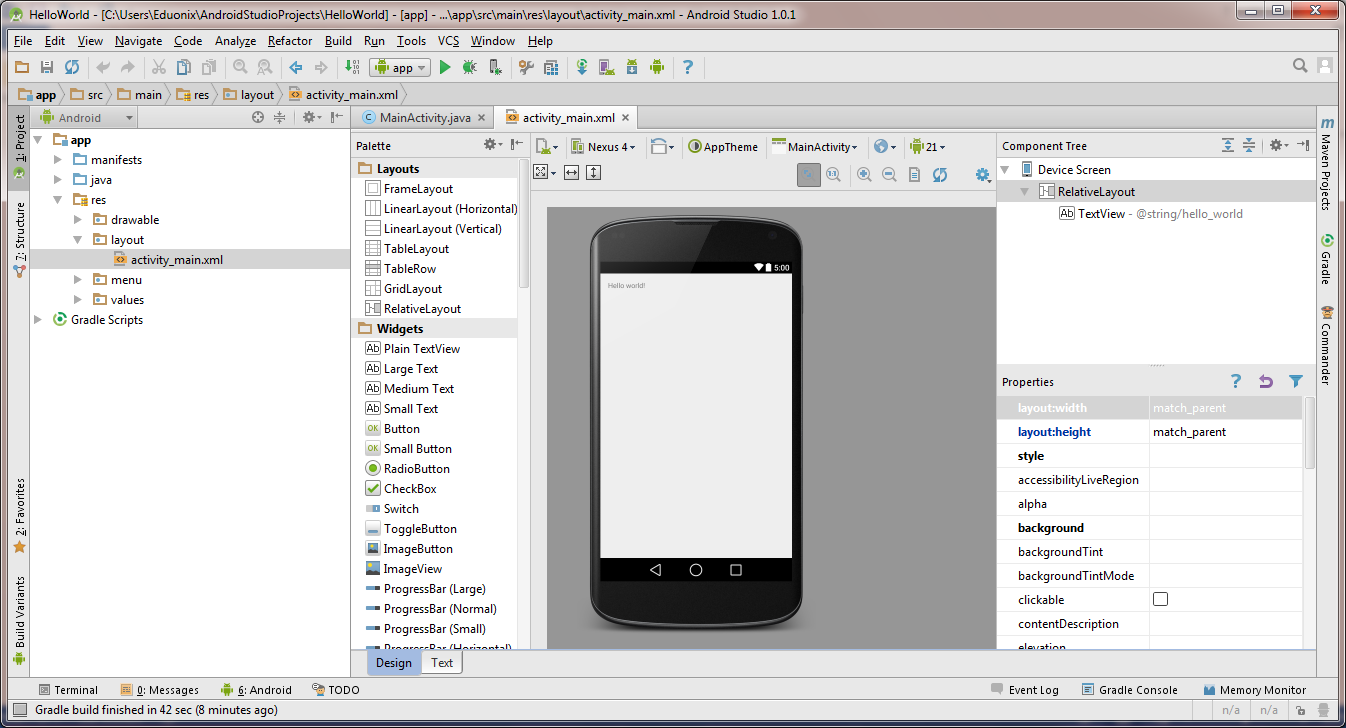
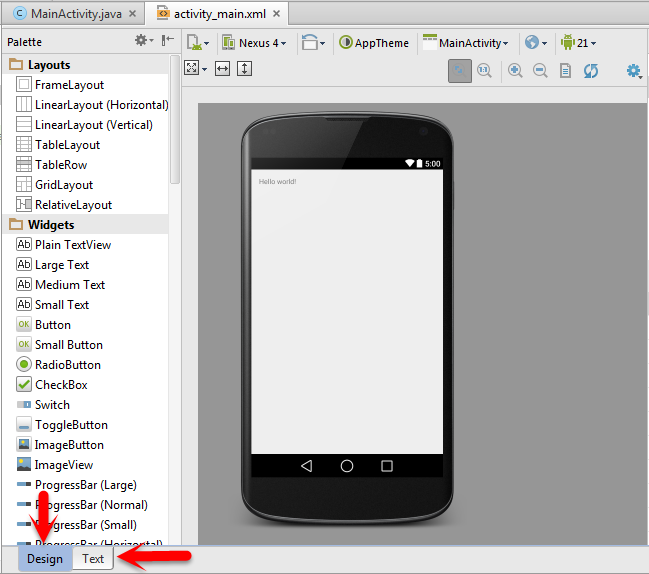
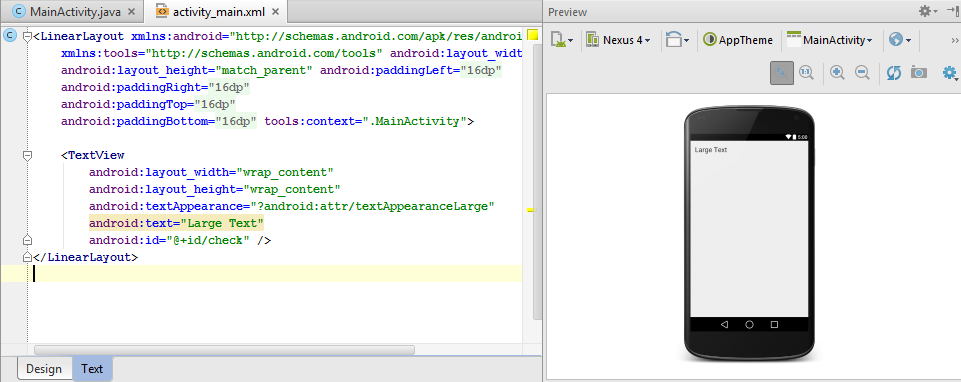
- If you have a look on your xml file, you will find two tabs Design and Text.
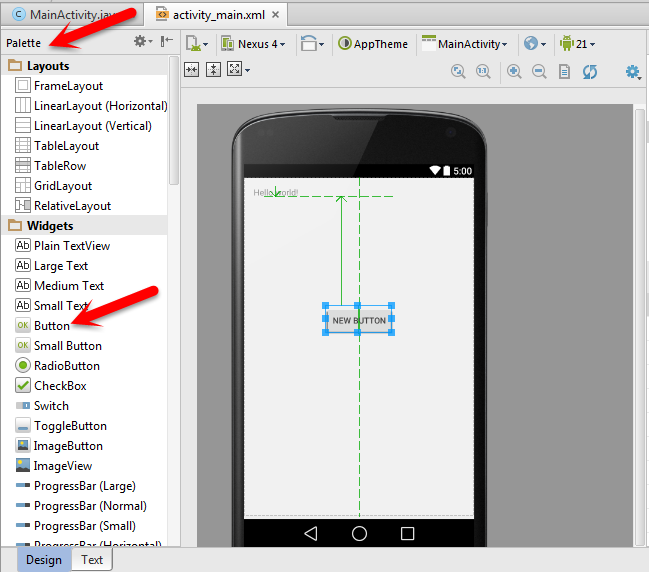
- In Design tab you can design your layout by dragging and dropping the views from palette. This palette is placed at the left hand side from where you have to drag the views and place it on the layout as shown below:
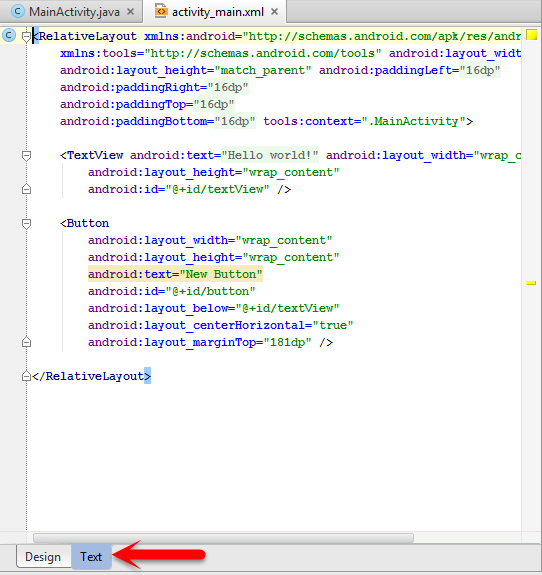
- Now if you check out the text tab in xml file, you will find the code related to the xml you have designed.
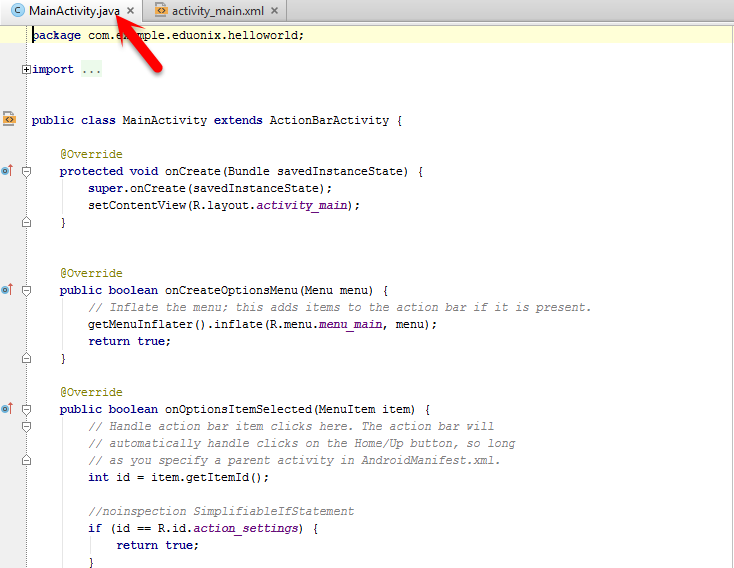
- The controller code is to be written in java class as shown in the figure given below:
- To run your application you must have your Android Virtual Device created.
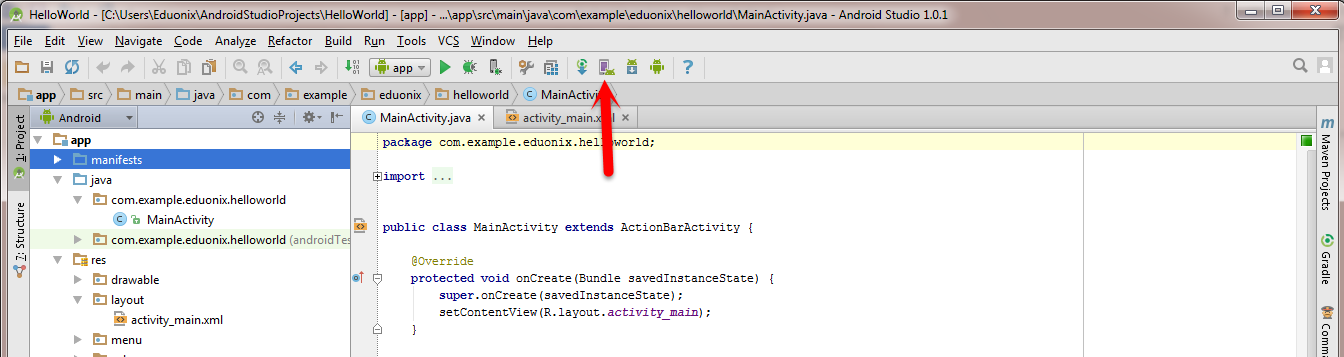
- To create your Android Virtual Device click on the AVD Manager as shown in the image given below:
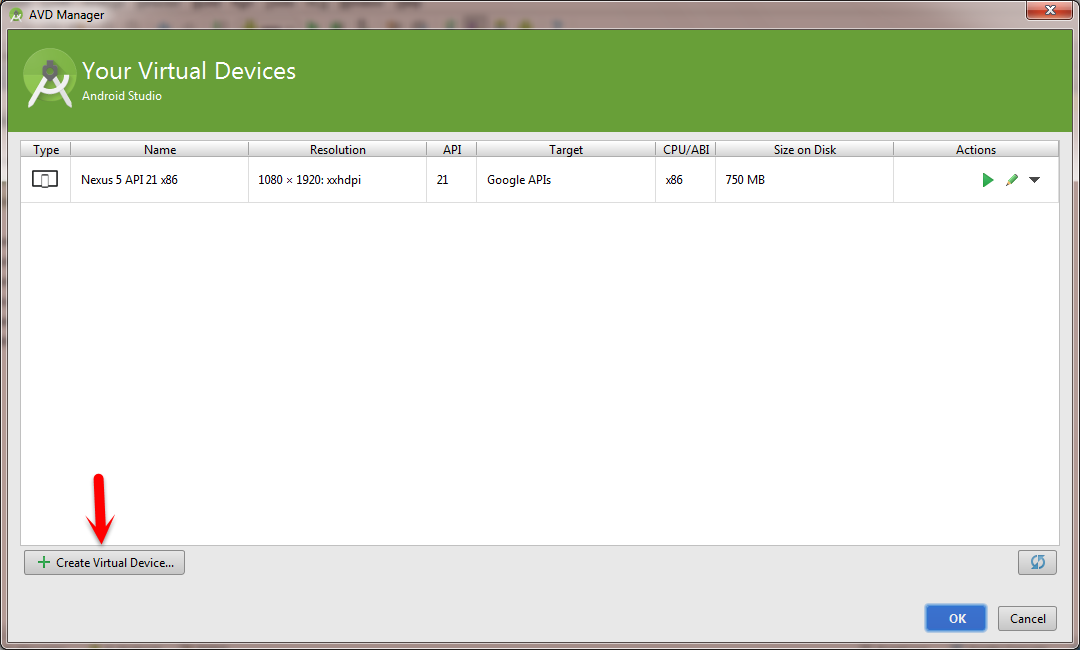
- AVD Manager window will get displayed where you have to click on Create Virtual Device button:
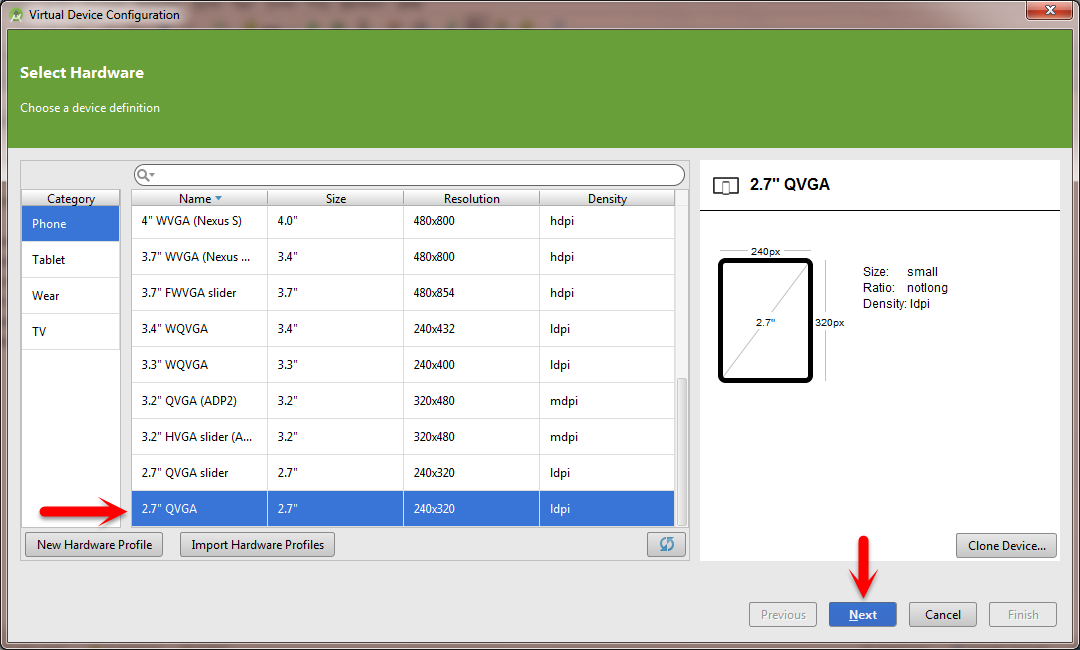
- After clicking the Create Virtual Device a category list will be generated from which you can select your respective device and click on the Next
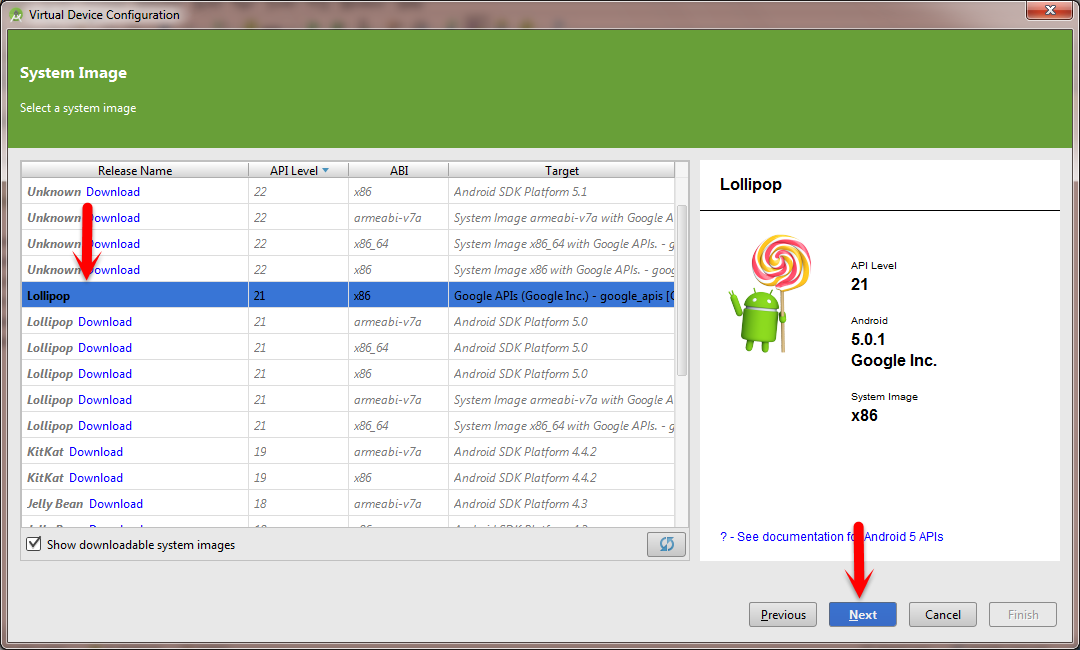
- Select the System Image and click on the Next button as shown in the image below:
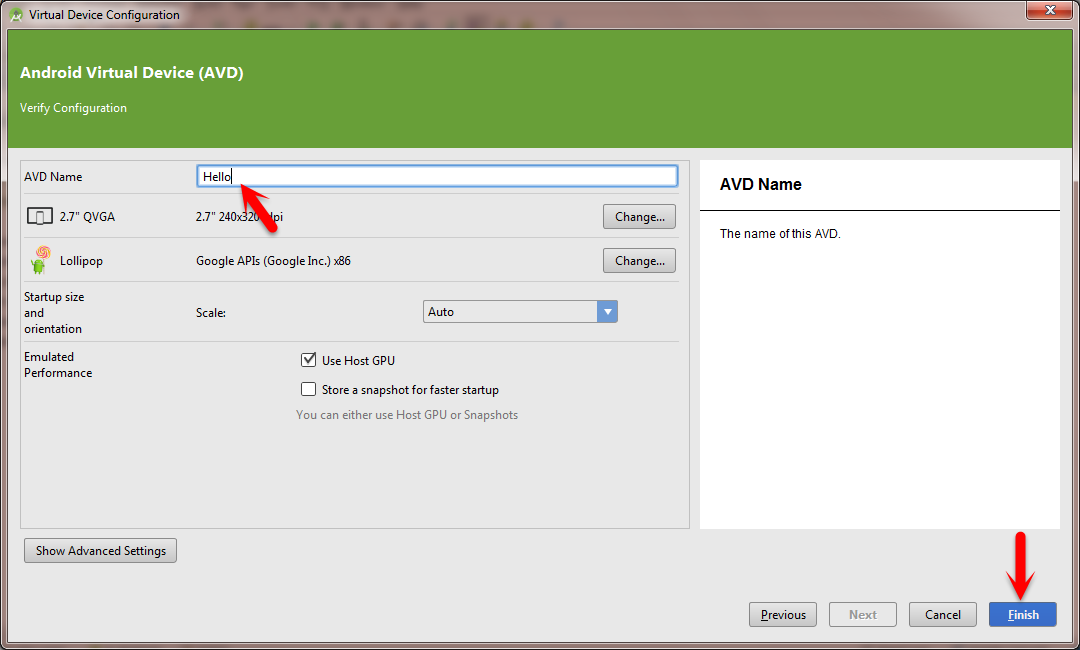
- Give a proper name to your AVD and click on the finish button :
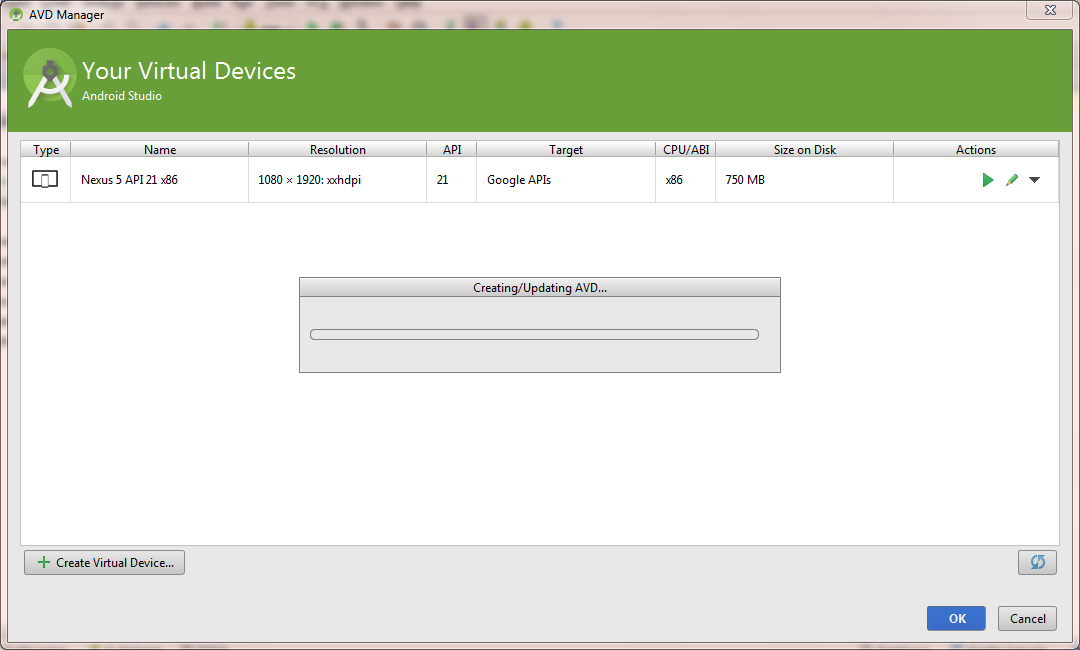
- After clicking the finish button your device will get created in the Android Virtual Device Manager:
- Once it gets created you can view your Android Virtual Device in the Android Virtual Device Manager window as shown in the image given below :
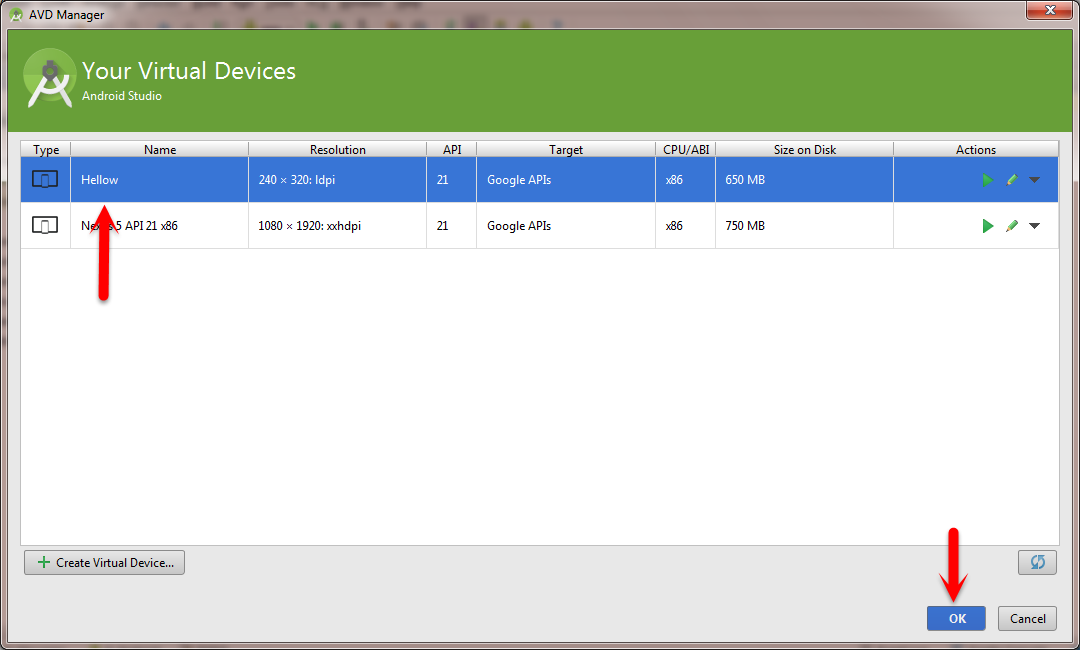
- Now just select your created Android Virtual Device and click on the OK button and your Android Virtual Device creation will be successful.
- You can also update your device by doing right click and selecting duplicate option where you can make changes in the device and can update it.
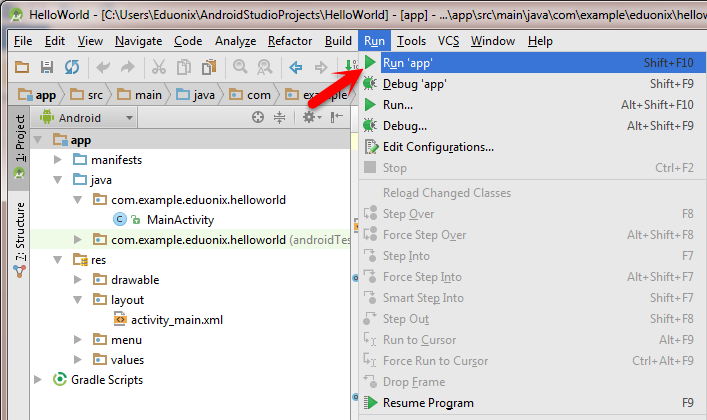
- Now to run your application, select your project and click on the Run
- After running your application your Android Virtual Device that is your emulator will get launched soon :

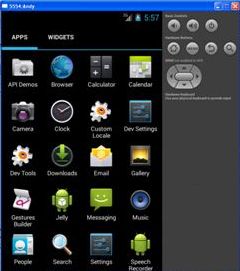
- Home Screen will be appeared in short time span, once we touch the applications button you will get the applications installed in it, which consists of the application that we developed.
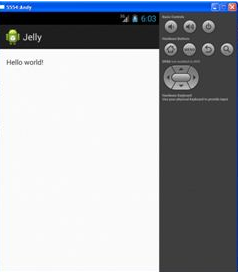
- Once you select the application that we developed and click on it Android Virtual Device will display our designed Activity.
- This confirms that you are done with the Installation Successfully. Now we will move towards our final project
3) Creating a ListView program in Android
- Now let’s create a small list view application in android
- In this application we will be implementing List View which will generate list of items in it and selecting a specific item it will display a Toast message that the respective item is selected.
- So, first of all create a new project and make your MainActivity.java and activity_main.xml file ready.
- In your activity_main.xml file drag and drop a TextView and change its id in the layout as shown in the figure given below to display the list.
- Now to display some items in the list lets create xml file in res-> under values-> Rightclick on values folder -> New-> XML->Values XML File as shown below, we have named it as data.xml:
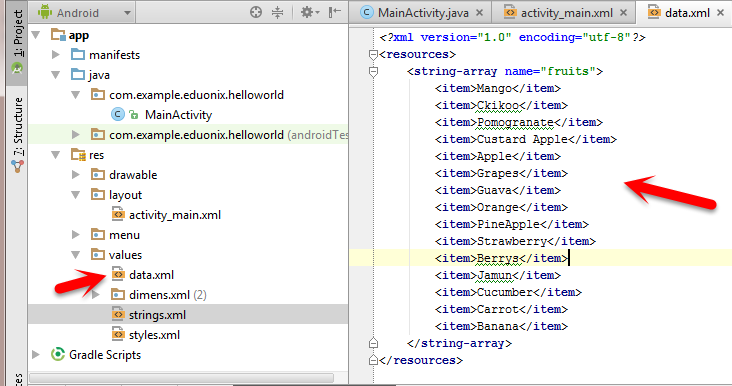
- In this xml file create a String array of name fruits and ad the items in it so that it will store all the items that are to be displayed in the list view.
data.xml file
<?xml version="1.0" encoding="utf-8"?>
<resources>
    <string-array name="fruits">
        <item>Mango</item>
        <item>Ckikoo</item>
        <item>Pomogranate</item>
        <item>Custard Apple</item>
        <item>Apple</item>
        <item>Grapes</item>
        <item>Guava</item>
        <item>Orange</item>
        <item>PineApple</item>
        <item>Strawberry</item>
        <item>Berrys</item>
        <item>Jamun</item>
        <item>Cucumber</item>
        <item>Carrot</item>
        <item>Banana</item>
    </string-array>
</resources>
- Now let’s write the code in our MainActivity.java class to display the list along with the items.
- As we are creating a listview, just extend your MainActivity class with ListActivity .
- In your MainActivity.java write the given code:
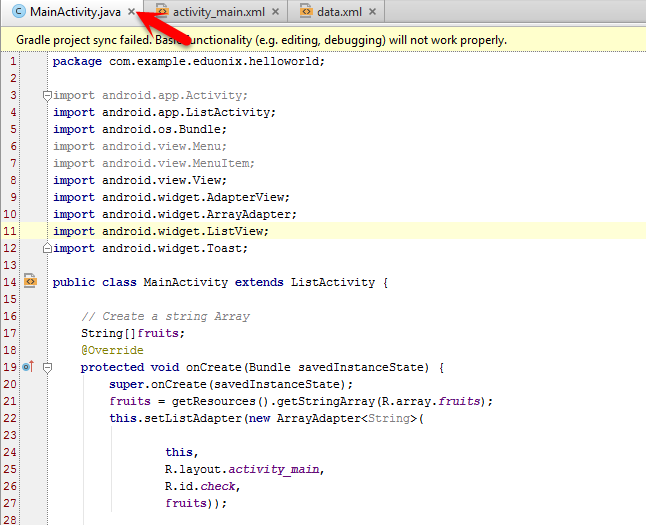
MainActivity.Java
public class MainActivity extends ListActivity {
// Create a string Array
String[]fruits;
@Override
protected void onCreate(Bundle savedInstanceState) {
super.onCreate(savedInstanceState);
fruits = getResources().getStringArray(R.array.fruits);
this.setListAdapter(new ArrayAdapter<String>(
this,
R.layout.activity_main,
R.id.check,
fruits));
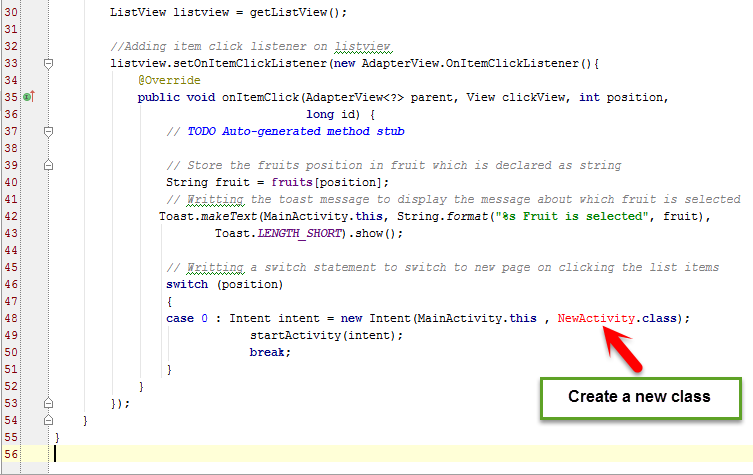
ListView listview = getListView();
//Adding item click listener on listview
listview.setOnItemClickListener(new AdapterView.OnItemClickListener(){
@Override
public void onItemClick(AdapterView<?> parent, View clickView, int position,
long id) {
// TODO Auto-generated method stub
// Store the fruits position in fruit which is declared as string
String fruit = fruits[position];
// Writting the toast message to display the message about which fruit is selected
Toast.makeText(MainActivity.this, String.format("%s Fruit is selected", fruit),
Toast.LENGTH_SHORT).show();
// Writting a switch statement to switch to new page on clicking the list items
switch (position)
{
case 0 : Intent intent = new Intent(MainActivity.this , NewActivity.class);
startActivity(intent);
break;
}
}
});
}
}
- Let’s have the explanation of the code:
- In line no 22 -> we are just getting the resources from the data.xml file that is the items stored in the array into a String named as fruits.
- Then in line 23-> Set the ListAdapter which will display the list on the layout by passing the parameters like your layout file, id of the textview, array of strings.
- Now just take a listview and create its object.
- In line no 33->Add an OnItemClickListener which will listen to the clicks done on the items in the list.
- In line no 40-> store the fruits position into a string named as fruit.
- Then to display the message that the respective fruit is selected we added Toast message in which we passed the string that was storing the fruits position.
- In line no 26-> We added a switch statement in which we passed position as a parameter hence it will detect the position of the click and will perform intent using the respective cases.
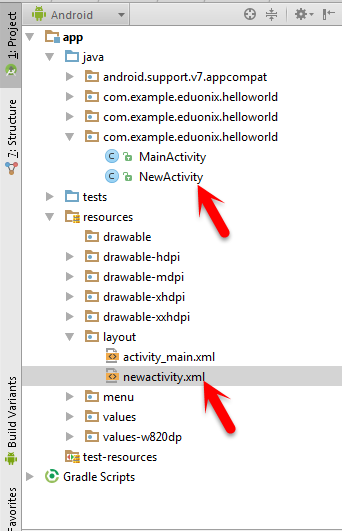
- Now to perform intent we need to create a new class which can be done through the following method:
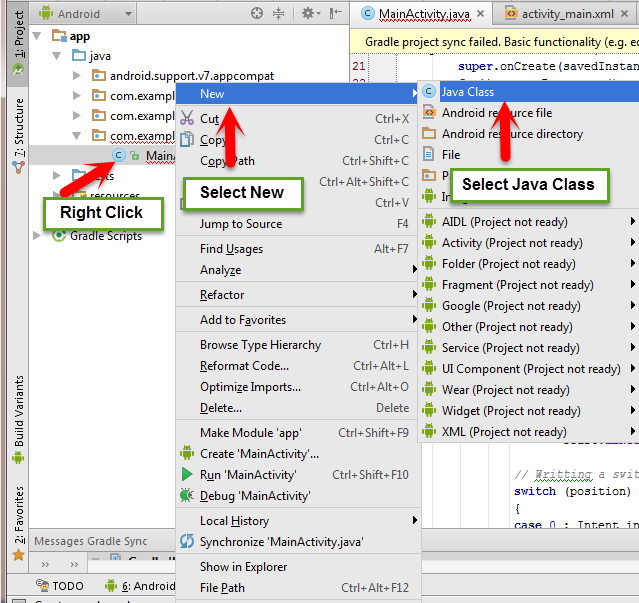
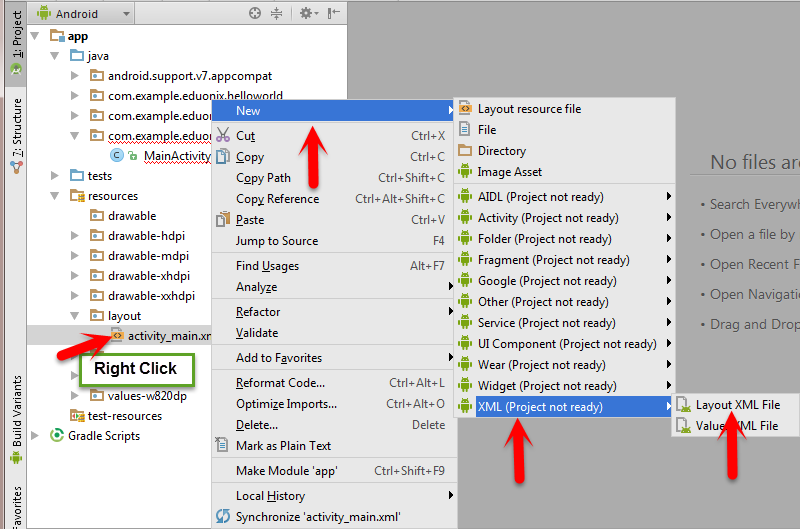
- Similarly create a new xml file for your new Java class:
- Thus now in your project you will have your new java and xml files.
- Now make your new java class ready for execution by writing the onCreate method.
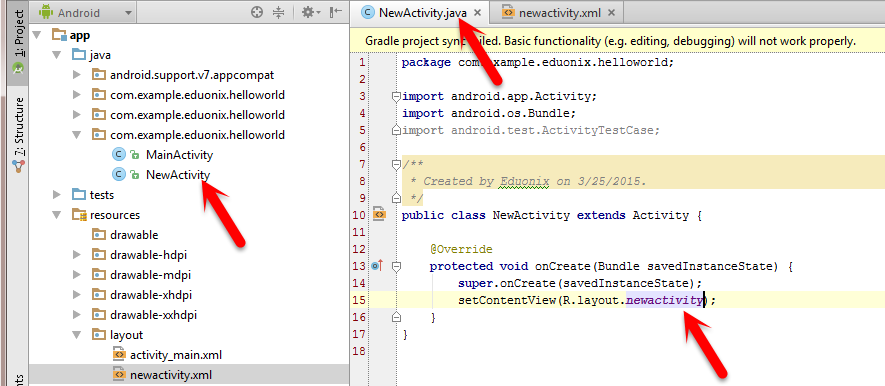
NewActivity.Java
public class NewActivity extends Activity {
  @Override
  protected void onCreate(Bundle savedInstanceState) {
    super.onCreate(savedInstanceState);
    setContentView(R.layout.newactivity);
  }
}
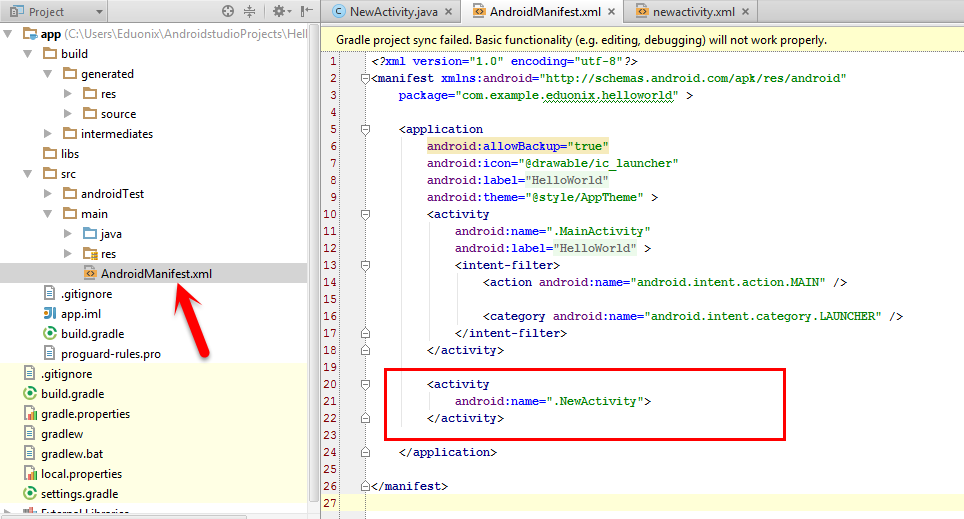
- Do not forget to make an entry of your new class in Manifest file using the activity tag
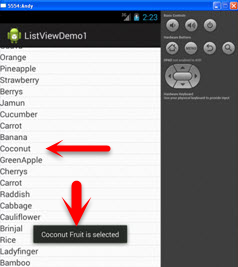
- Thus, now the application is completed and you can run it and see the output on the emulator:
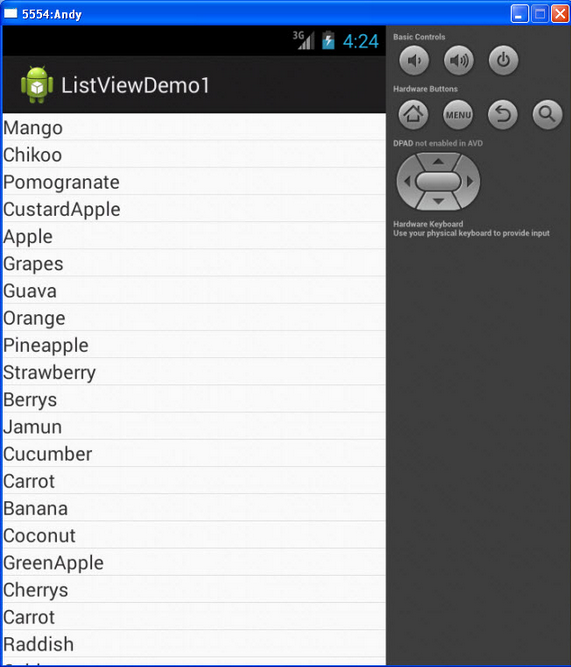
- And now if you click on an item from the list it will display the toast message and if you have defined the cases in the switch it will navigate to the respective page:
Thus, we have successfully studied how to install Android Studio on your machine using which we created a sample program and also developed a small ListView application in Android.
[sociallocker]
download sources
[/sociallocker]


