
Cross-browser effect of waves using javascript
Today’s lesson quite entertaining, we’ll learn how to construct a wave effect. For clarity, we will apply that effect to the picture. I will explain how it works directly in our tutorial, now, its time to see our online demonstration.
Here are samples and downloadable package:
Live Demo
download in package
Ok, download the example files and lets start coding !
Step 1. HTML
As usual, we start with the HTML. This is source code of our sample:
index.html
<html>
<head>
    <title>Effect of waves using pure JavaScript</title>
    <link rel="stylesheet" type="text/css" href="css/main.css" />
    <script type="text/javascript" src="js/main.js"></script>
</head>
 <body>
    <div class="example">
        <div id="main_object">
            <img id="source_img" src="image.jpg">
            <div id="wave_zone"></div>
        </div>
    </div>
 </body>
</html>
Here are prepared object, with 2 elements inside – image itself and bottom area for waving effect
Step 2. CSS
Here are single CSS file with all necessary styles:
css/main.css
body{background:#eee;margin:0;padding:0}
.example{background:#FFF;width:800px;border:1px #000 solid;margin:20px auto;padding:15px;-moz-border-radius: 3px;-webkit-border-radius: 3px}

#main_object {
    position: relative;
}
#main_object img {
    display: block;
}
#main_object #wave_zone img {
    position:absolute;
    left:-9999px;
}
#main_object span {
    position:absolute;
    font-size:0px;
}
#main_object #wave_zone {
    position:relative;
    display:block;
    overflow:hidden;
    background-color:#000;
}
Step 3. JS
Here are our main Javascript:
js/main.js
// wave sub objects
function WSubObj(num, img, object, iwidth, iheight){
    this.S = num;
    var o = document.createElement("span");
    o.style.overflow = "hidden";
    o.style.width = iwidth + "px";
    o.style.height = iheight + "px";
    o.style.top = (num-1) + "px";
    var oI = document.createElement("img");
    oI.src = img.src;
    oI.style.left = "0px";
    oI.style.top = (-iheight + num) + "px";
    oI.style.width = iwidth + "px";
    oI.style.height = iheight + "px";
    o.appendChild(oI);
    document.getElementById("wave_zone").appendChild(o);
    this.spa = o.style;
    this.ddx = 0
    this.PX  = 0
    this.x   = 0
    if (num > 0) this.prev = object[num - 1];
}

WSubObj.prototype.main = function(power){
    var x0 = (this.S == 0) ? Math.random() * power : this.prev.x;
    this.x = this.PX += (this.ddx += ( (x0 - this.PX - this.ddx) * 2 ) / 2.8) / 1.4;
    this.spa.left = Math.round(this.x) + "px";
}

// wave effect object
var weff = {
    // variables
    power : 2.2,

    // inner variables
    object : new Array(),
    simg : null,
    iwidth  : 0,
    iheight  : 0,

    // initialization function
    init : function() {
        for (var i = 0; i < this.iheight/4; i++)
            this.object[i] = new WSubObj(i, this.simg, this.object, this.iwidth, this.iheight);
    },

    // main loop function of water effect
    run : function() {
        var i = 0, o;
        while (o = weff.object[i++]) o.main(weff.power);
        setTimeout(weff.run, 40);
    }
};

// on page load
window.onload = function() {
    weff.simg = document.getElementById("source_img");
    weff.iwidth = weff.simg.width;
    weff.iheight = weff.simg.height;

    // set necessary width and height for wave zone element
    var css = document.getElementById("wave_zone").style;
    css.height = (weff.iheight/4 - 1) + "px";
    css.width  = weff.iwidth + "px";

    weff.init();
    weff.run();
}
It is rather simple. When the page loads – I initialize our main object, and create multiple subimages (in spans) for each row of second half of our sample, then, periodically gently increase the amplitude of oscillations. So, in result – we can see effect of waves.
Step 4. Images
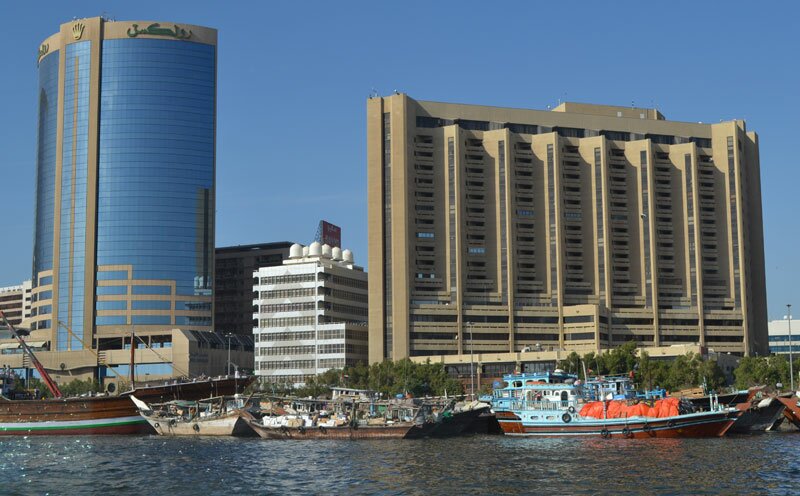
For our demo I used only one image:
Live Demo
download in package
Conclusion
Today I told you how to create easy wave effect to images. You always can play with different variables of this demo ot archive different funny results. Hope our javascript lessons still interesting for you. Good luck!


I tried it and it works cool
very cool & good js code again, thank you very much for sharing.