
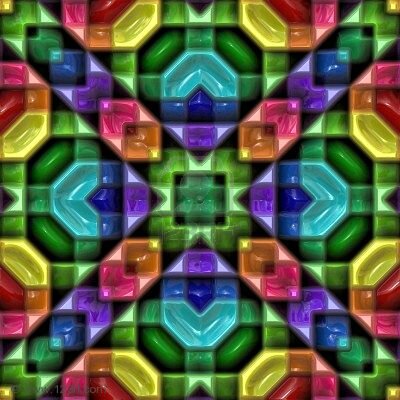
Creating Kaleidoscope for iPhone
Today we will start our lessons where we will create own first applications for iPhone. Last time this mobile device become more and more popular. In our tutorial I will show you about first steps – creating pretty easy Kaleidoscope application. Kaleidoscope itself we already made here. Today we will try to do it for iPhone. Plus, I going to use jQTouch plugin to allow using touchpad in application (we will able to click at ‘about’ button.
So, let’s start!
Here are samples and downloadable package:
Live Demo
download in package
Ok, download the example files and lets start coding !
Step 1. HTML
As usual, we start with the HTML. This is source code of our sample:
index.html
<!doctype html>
<html>
    <head>
        <meta charset="UTF-8" />
        <title>Kaleidoscope for iPhone</title>

        <style type="text/css" media="screen">@import "jqtouch/jqtouch.min.css";</style>
        <style type="text/css" media="screen">@import "css/main.css";</style>
        <script type="text/javascript" src="http://ajax.googleapis.com/ajax/libs/jquery/1/jquery.min.js"></script>
        <script src="jqtouch/jqtouch.min.js" type="application/x-javascript" charset="utf-8"></script>

        <script type="text/javascript" charset="utf-8">
            var jQT = new $.jQTouch({
                icon : 'images/icon.png',
                cacheGetRequests: true,
                addGlossToIcon : false,
                statusBar : 'black',
                preloadImages: [
                    'images/button.png',
                    'images/grayButton.png',
                ]
            });

            $(document).ready(function() {
                var z = 0;
                var tid = setTimeout(mycode, 100);
                function mycode() {
                  z+=2;
                  var $z = z;
                  $(".kal_cont .ksc").each(function(i){
                    $(this).css({backgroundPosition: $z+"px "+$z+"px"});
                  });
                  tid = setTimeout(mycode, 100);
                }
            });
        </script>
    </head>
    <body>
        <div id="about" class="selectable">
            <p><img src="images/icon.png"/></p>
            <p>
                <strong>Kaleidoscope for iPhone</strong>
                <a href="http://script-tutorials.com">By Andrew</a>
            </p>
            <p>This application using <br /> <strong>jQTouch</strong></p>
            <p><br /><br /><a href="#" class="gray_button goback">Close</a></p>
        </div>

        <div id="ks_container" class="current">
            <div class="toolbar">
                <h1>Kaleidoscope</h1>
                <a class="button slideup" id="infoButton" href="#about">About</a>
            </div>
            <div class="kal_main">
                <div class="kal_cont">
                  <div class="ks s1"><div class="ksc"></div></div>
                  <div class="ks s2"><div class="ksc"></div></div>
                  <div class="ks s3"><div class="ksc"></div></div>
                  <div class="ks s4"><div class="ksc"></div></div>
                  <div class="ks s5"><div class="ksc"></div></div>
                  <div class="ks s6"><div class="ksc"></div></div>
                  <div class="ks s7"><div class="ksc"></div></div>
                  <div class="ks s8"><div class="ksc"></div></div>
                  <div class="ks s9"><div class="ksc"></div></div>
                  <div class="ks s10"><div class="ksc"></div></div>
                  <div class="ks s11"><div class="ksc"></div></div>
                  <div class="ks s12"><div class="ksc"></div></div>
                </div>
            </div>
        </div>
    </body>
</html>
When page loaded, I started looping changing background positions of our kaleidoscope, so in result we will have effect of screensaver, and it looks fine. Not bad for begining.
Step 2. CSS
Here are single CSS file with all necessary styles:
css/main.css
body{
    background:#555;
    color:#ddd;
}
.toolbar{
    -webkit-box-sizing:border-box;
    border-bottom:1px solid #000;
    height:45px;
    background-color:#004473;
    background:0 color-stop(1,#0272a4));
    position:relative;
    padding:10px;
    background:-webkit-gradient(linear, right bottom, right top, color-stop(0.01, #004473), color-stop(1, #0272a4));
}
.toolbar > h1{
    position:absolute;
    overflow:hidden;
    left:50%;
    top:10px;
    line-height:1em;
    height:40px;
    font-size:20px;
    width:150px;
    font-weight:700;
    text-shadow:rgba(0,0,0,1) 0 -1px 1px;
    text-align:center;
    text-overflow:ellipsis;
    white-space:nowrap;
    color:#fff;
    margin:1px 0 0 -75px;
}
body.landscape .toolbar > h1{
    margin-left:-125px;
    width:250px;
}
.button{
    position:absolute;
    overflow:hidden;
    top:8px;
    right:10px;
    width:auto;
    height:30px;
    line-height:30px;
    font-family:inherit;
    font-size:12px;
    font-weight:700;
    color:#fff;
    text-shadow:rgba(0,0,0,0.5) 0 -1px 0;
    text-overflow:ellipsis;
    text-decoration:none;
    white-space:nowrap;
    background:none;
    -webkit-border-image:url(../images/button.png) 0 5 0 5;
    border-width:0 5px;
    margin:0;
    padding:0 3px;
}
.gray_button{
    display:block;
    text-align:center;
    font-size:20px;
    font-weight:700;
    text-decoration:inherit;
    -webkit-border-image:url(../images/grayButton.png) 0 12 0 12;
    color:#FFF;
    border-width:0 12px;
    padding:10px;
}
#about{
    text-shadow:rgba(255,255,255,0.3) 0 -1px 0;
    font-size:13px;
    text-align:center;
    background:#161618;
    padding:100px 10px 40px;
}
#about p{
    margin-bottom:8px;
}
#about a{
    color:#fff;
    font-weight:700;
    text-decoration:none;
}
Make attention, that here are only new styles for iPhone, all other styles of Kaleidoscope will available in package
Step 3. Other files
For our projects I using also files of jQTouch library: jqtouch.min.css and jqtouch.min.js (located in jqtouch folder), and also next images:


![]()
Live Demo
download in package
Conclusion
Today I told you how to build new iPhone application. Currently it looks like screensaver. Sure that you will happy to play with it. Good luck!


Great job much thanks for the time and effort. Super detail, some very good ideas here and well enough explained that I may even get them to work. Thanks for sharing.