
Creating e-cards using jParallax
During browsing web I came across a very interesting plugin – jParallax, and suddenly remembered that soon the international women’s day, and decided that today will do something nice for our women. Our today’s article will be about how to create a nice e-card using our favorite library jQuery with own hands.
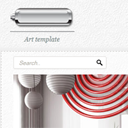
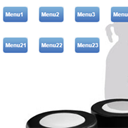
What is nice – that we will able to put different images into different layers. And, due mouse moving – our layers will moving too. Just check today`s sample, nice, isn`t it?
Here are samples and downloadable package:
Live Demo
download in package
Ok, download the example files and lets start coding !
Step 1. HTML
As usual, we start with the HTML.
This is our main page code.
index.html
<script src="js/jquery.min.js"></script>
<script src="js/jquery.jparallax.js"></script>
<link rel="stylesheet" href="css/main.css" type="text/css" />

<div class="examples">
    <h2>Using jParallax to create own interactive e-card</h2>
    <div id="my_ecard">
        <img src="images/bg.jpg" alt="" style="width:1600px;height:800px;"/>
        <img src="images/layer1.png" alt="" style="width:1400px;height:700px;"/>
        <img src="images/layer2.png" alt="" style="width:1400px;height:700px;"/>
        <img src="images/layer3.png" alt="" style="width:1200px;height:600px;"/>
    </div>
    <div style="clear:both"></div>
</div>

<script>
jQuery(document).ready(function(){
  jQuery('#my_ecard').jparallax();
});
</script>
Step 2. CSS
Here are used CSS styles. Most important is properties of #my_ecard. It keep all our layers in own boundary.
css/main.css
body{background:#eee;font-family:Verdana, Helvetica, Arial, sans-serif;margin:0;padding:0}
.examples{background:#FFF;width:800px;font-size:80%;border:1px #000 solid;margin:3.5em auto 2em;padding:1em 2em 2em}

#my_ecard {position:relative; overflow:hidden; width:800px; height:600px;}
Step 3. JS
Here are necessary JS file to our project.
js/jquery.min.js, jquery.jparallax.js
This is 2 JS libraries which we will using. Its not included in our post, but always available in package.
For initialization of our jParallax need just call its constructor.
<script>
jQuery(document).ready(function(){
  jQuery('#my_ecard').jparallax();
});
</script>
I decided not use any custom parameters in today`s sample. But you can read more about its params right here.
Step 4. Images
Also we need several images for our demo (these images of different layers):


Live Demo
download in package
Conclusion
Today, I told you how can you are fishing your favorite on 8 March:) But I hope that this lesson will help you and in other applications. Good luck!


Nice application for jParallax.
Brill. Keep up the great work.