MP3 Player with HTML5
In you are a beginner in HTML5 and you are looking for new knowledge – our new tutorial is for you. We are about to tell you how to create your own html5 mp3 player. For the first lesson, we are going to tell you about HTML5 Audio Element. The HTML5 audio element is at the core of the new media API. The element itself allows you to play several different types of audio files and has a convenient built-in controller, which allows the user to control the audio playback. Let’s start by creating a very basic HTML document that plays an audio file.
Before we get started, let’s assemble the tools that you need to create and test the actual file. Here’s what you’ll need:
- A text editor
- A web browser or two
- An MP3 music file (preferably, one you like!)
If you’ve never done this type of coding before, let’s take a quick moment to go over each item on the list above.
Text Editor: A text editor is like a word processor – with one important difference. A word processor will embed control codes in the text that the word processor will use to render the document. A text editor stores the text as "pure text." We need pure text since the browser, which will display your final work product, requires text to be free from control codes. You may use any text editor you like. For the PC, you may use Notepad++ and EditPad+ (both are recommended). Default Notepad, which comes with the Windows operating system is OK too, but, we don’t recommend to use it (because of extra blank lines which you could get in the result). For Mac or PC, you may use the free version of Komodo edit, which is available on Komodo’s web site: http://www.activestate.com/komodo-edit. For the tutorial, I’ll be using Sublime – a popular and fairly new editor for the PC.
In the end, it doesn’t really matter which text editor you use, so find one that you are comfortable with and go for it!
Web Browser (two, or more): I’m sure if you’re reading this, you already have at least one web browser on your machine. I recommend having at least two or three web browsers. At the time of this writing, browsers are implementing HTML5 with varying levels of compliance to the standard. This means you may see slight differences between how something works in IE, Safari, Firefox, Chrome and other browsers.
MP3 Music File: Obviously, if you’re going to play some audio, you need some audio to play. Choose a song you like, because as you go through this first part of the tutorial you’re likely to be hearing it over and over again. Personally, I like Journey.
Once you’ve collected the necessary items, it’s time to start writing some code. Here are the steps to creating the first version of your MP3 Player:
1. Open your Text editor.
2. Type the code below. I call this the "Basic Document Structure". I start almost all of my HTML examples with this structure. You can think of it as the skeleton of an HTML file. We’ll be using the HTML5 version of this structure. You might see slight variations of this in other courses and texts – but they all serve the same purpose.
<!DOCTYPE html>
<html>
<head>
        <title>Audio Player</title>
</head>
<body>

</body>
</html>
3. Save the file somewhere easy to find. When you save the file you must append the extension .html or .htm. This extension tells the browser that the file you have created is an HTML file and is readable by the browser itself. I am saving mine as audioPlayer1.html.

4. The basic document structure, by itself, doesn’t really do anything except give us a place to put our content. Now we’re ready to insert our audio tag and test the music player. Go ahead and copy your MP3 file into the same folder as the HTML document you saved in the previous step.
5. Now put your cursor between the open and closing body tags. The opening body tag looks like this: <body>. The closing body tag is preceded with a forward slash like this: </body>. This is what it looks like in my text editor:

6. Type the following code where you just placed your cursor. Please note that where it says music.mp3 you should type the file name of the MP3 music file you moved in step four.
<audio controls="controls">
        <source src="music.mp3" type="audio/mpeg">
</audio>
7. Save your file one more time. Now we’re ready to test our very simple MP3 player. To open the file in your primary browser, you may simply navigate to the file itself and then double-click it. You also may open the file from any browser by using the open command and navigating to the HTML file you just created.
If your MP3 player appears not to work – don’t worry! There’s a reason.
While HTML5 has given the browsers a way to play audio (and video) files in a non-proprietary way, not every browser plays every audio format. You may be familiar with some common audio players such as MP3 (which we’ve been using in this example), Aiff, and WAV. You are likely not familiar with another format – Ogg Vorbis.
Examine the chart below to determine which audio formats are familiar with which common browser:
|
Browser |
Ogg Vorbis |
MP3 |
WAV |
|
Firefox |
X |
X |
|
|
Safari |
X |
X |
|
|
Chrome |
X |
X |
|
|
Internet Explorer |
X |
X |
Based on the chart provided above, if you have an MP3 but attempted to play it using Firefox, you would not have had a good result. Usually, I use a combination of MP3 and Ogg Vorbis to cover most of the major browser platforms. You can easily convert your audio file(s) to Ogg using one of the free and convenient online converter programs. One easy-to-use converter is located at: http://audio.online-convert.com/convert-to-ogg
You can also use an audio production program such as Adobe’s Soundbooth, or the free and ubiquitous Audacity to complete the conversion. Once you convert the file, you’ll have two separate audio files – one in MP3 format and one in OGG. (I’m not really a big fan of WAV files due to their size; however, you can use a combination of WAV and Ogg Vorbis and be covered in all of the major browsers as well)
The next step is to add the source for the Ogg Vorbis file to your code. Modify the audio element in your code so it looks like this:
<audio controls="controls">
        <source src="music.mp3" type="audio/mpeg">
        <source src="music.ogg" type="audio/ogg">
</audio>
Now, let’s run the code in the browser again. You should be able to just double-click the icon for the HTML file. If you have more than one browser installed on your machine, you might want to load it in each browser and note the differences. If you have both an MP3 file and an Ogg Vorbis file, the music should play successfully in every browser.
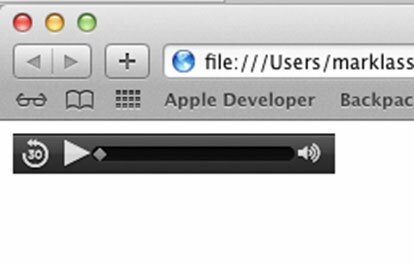
Here’s what the functional player looks like in Chrome, Firefox and Safari (Mac version):

Chrome Audio Player

Audio Player in Firefox

Audio Player in Safari
Most of the code we have written so far is fairly intuitive, and you can garner most of the meaning simply by reading the tags.
In the audio tag itself, the controls modifier tells the browser to use the Play, Volume and Song position controls shown in the images above. If the value were set to controls="false" or left out altogether, no controls would appear. You might be wondering how the user plays the music if the controls aren’t visible. We’ll get to that in the next chapter. By the way, technically, modifiers placed in tags – in a fashion similar to the way controls are placed in the audio tag – are known as attributes.
Speaking of attributes, there are several other attributes that can be used with the audio tag in HTML5. These affect other aspects of the audio player. I don’t actually use these attributes very much and they’re not necessary for this project. For your reference, they are listed in the table below:
|
Attribute |
Purpose |
|
src |
As an alternative to use the <source> tags inside the <audio> element the src of the audio may be listed as an attribute of the audio tag. The value of the attribute should be the URI of the audio file. Example: <audio src="music.mp3" controls="controls"> |
|
preload |
This attribute has three possible values: none, metadata and auto. Where supported by the browser, the attribute will influence how the media should be preloaded to provide the best user experience. |
|
Autoplay |
If set to autoplay = "autoplay" the media will start playing as soon as the media loads. Note that Apple has disabled this feature in iOS. Users generally find it annoying when media plays when a page loads and tend to prefer to start and stop media elements themselves. |
|
Loop |
When set to loop="loop" this attribute will cause the media to play over and over until stopped by the user. |


Andrew… your directions are excellent! I am preparing to redesign my website, I have Dreamweaver… I will be back to explore more scripts!!! Thanks. =A=
very good ,nice, thanks frd…