
3D gallery – using javascript
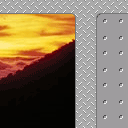
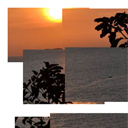
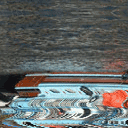
Today we continue JavaScript lessons, and our article will about creating modern 3d photo gallery using pure javascript. We will simulate 3D effect using z-indexes. Via mouse clicking we will moving from one photo to another. And I sure that better to see demo now.
Here are sample and downloadable package:
Live Demo
download in package
Ok, download the example files and lets start coding !
Step 1. HTML
As usual, we start with the HTML.
This is our main page code of 3d gallery.
index.html
<link rel="stylesheet" href="css/main.css" type="text/css" media="all" />
<script src="js/main.js" type="text/javascript"></script>

<div class="example" id="gall">
    <img src="images/pic1.jpg"><span>Picture 1 title<br>and description.</span>
    <img src="images/pic2.jpg"><span>Picture 2 description.</span>
    <img src="images/pic3.jpg"><span>Picture 3 description.</span>
    <img src="images/pic4.jpg"><span>Picture 4 description.</span>
    <img src="images/pic5.jpg"><span>Picture 5 description.</span>
    <img src="images/pic6.jpg"><span>Picture 6 description.</span>
    <img src="images/pic7.jpg"><span>Picture 7 description.</span>
    <img src="images/pic8.jpg"><span>Picture 8 description.</span>
    <img src="images/pic9.jpg"><span>Picture 9 description.</span>
    <img src="images/pic10.jpg"><span>Picture 10 description.</span>
    <img src="images/pic11.jpg"><span>Picture 11 description.</span>
    <img src="images/pic12.jpg"><span>Picture 12 description.</span>
    <img src="images/pic13.jpg"><span>Picture 13 description.</span>
    <img src="images/pic14.jpg"><span>Picture 14 description.</span>
    <img src="images/pic15.jpg"><span>Picture 15 description.</span>
</div>
As we can see – I put all used images for gallery in ‘images’ folder. All pretty easy here.
Step 2. CSS
Here are used CSS styles:
css/main.css
body{background:#333;margin:0;padding:0}

.example {
    position:absolute;
    left: 0%;
    top: 0%;
    width: 100%;
    height: 95%;
    background: #333;
    overflow: hidden;
}
.example img {
    position: absolute;
    background: #666;
    overflow: hidden;
    cursor: pointer;
    left: 100%;
    border-color: #333;
    border-style: solid;
    border-width: 1px;
}
.example span {
    position: absolute;
    color: #efe;
    font-family: verdana;
    font-size: 0px;
    white-space: nowrap;
    left: -999px;
    background: #333;
    /*filter: alpha(opacity=70);
    opacity: 0.7;*/
    background: rgba(0, 0, 0, 0.7);
}
Step 3. JS
Here are our main control JS file.
js/main.js
to_px = function (x) { return ''.concat(Math.round(x), 'px'); }
g_resize = function() { pgal.resize(); }

var pgal = {
    O : [], N : 0, S : 0, img : 0, span : 0, xm : 0, ym : 0, nx : 0, ny : 0, nw : 0, nh : 0,
    cx : 0, cy : 0, zoom : 1, x : 0, y : 0, z : -30000, xt : 0, yt : 0, zt : 0,

    init : function () {
        this.cx   = this.nw / 2;
        this.cy   = this.nh / 2;
        this.img  = document.getElementById('gall').getElementsByTagName('img');
        this.span  = document.getElementById('gall').getElementsByTagName('span');
        this.N    = this.img.length;
        for (var i = 0; i < this.N; i++) this.O[i] = new this.PGObj(i);
        this.run();
        this.O[0].click();
    },
    resize : function () {
        var o   = document.getElementById('gall');
        this.nx   = o.offsetLeft;
        this.ny   = o.offsetTop;
        this.nw   = o.offsetWidth;
        this.nh   = o.offsetHeight;
        this.zoom = this.nh / 900;
    },
    run : function () {
        pgal.cx += (pgal.xm - pgal.cx) * .1;
        pgal.cy += (pgal.ym - pgal.cy) * .1;
        pgal.x  += (pgal.xt - pgal.x)  * .05;
        pgal.y  += (pgal.yt - pgal.y)  * .05;
        pgal.z  += (pgal.zt - pgal.z)  * .1;
        var i = pgal.N;
        while (i--) pgal.O[i].anim();
        setTimeout(pgal.run, 16);
    },
    PGObj : function (n) {
        this.n                = n;
        this.x                = pgal.zoom * Math.random() * pgal.nw * 3 - pgal.nw;
        this.y                = pgal.zoom * Math.random() * pgal.nh * 3 - pgal.nh;
        this.z                = Math.round(n * (10000 / pgal.N));
        this.w                = pgal.img[n].width;
        this.h                = pgal.img[n].height;
        this.oxt              = pgal.span[n];
        this.oxs              = this.oxt.style;
        this.txt              = pgal.span[n].innerHTML;
        this.oxt.innerHTML    = "";
        this.obj              = pgal.img[n];
        this.obs              = this.obj.style;
        this.obj.parent       = this;
        this.obj.onclick      = function() { this.parent.click(); }
        this.obj.ondrag       = function() { return false; }
        this.oxt.style.zIndex = this.obj.style.zIndex = Math.round(1000000 - this.z);
        this.F                = false;
        this.CF               = 100;
        this.sto              = [];

        this.anim = function() {
            var f = 700 + this.z - pgal.z;
            if (f > 0) {
                var d               = 1000 / f;
                var X               = pgal.nw * .5 + ((this.x - pgal.x - pgal.cx) * d);
                var Y               = pgal.nh * .5 + ((this.y - pgal.y - pgal.cy) * d);
                var W               = d * this.w * pgal.zoom;
                var H               = d * this.h * pgal.zoom;
                this.obs.left       = to_px(X - W * .5);
                this.obs.top        = to_px(Y - H * .5);
                this.obs.width      = to_px(W);
                this.obs.height     = to_px(H);
                this.oxs.visibility = (this.CF-- > 0 && Math.random() > .9) ? "hidden" : "visible";
                this.oxs.left       = to_px(X - W * .5);
                this.oxs.top        = to_px(Y + H * .5);
                if ((pgal.zt - pgal.z) < 20) {
                    if (! this.F) {
                        this.F            = true;
                        this.CF           = Math.random() * 200;
                        this.oxs.fontSize = to_px(1 + d * 20 * pgal.zoom);
                        var T             = "";
                        var tn            = this.txt.length;
                        for(var i = 0; i < tn; i++) {
                            T = T.concat(this.txt.charAt(i));
                            this.sto[i] = setTimeout('pgal.O['.concat(n, '].oxt.innerHTML = "', T, '";'), Math.round(f / 4) + 10 * i);
                        }
                    }
                } else {
                    this.F = false;
                    this.oxt.innerHTML = "";
                }
            } else {
                this.x  = pgal.zoom * Math.random() * pgal.nw * 3 - pgal.nw;
                this.y  = pgal.zoom * Math.random() * pgal.nh * 3 - pgal.nh;
                this.z += 10000;
                this.oxs.zIndex = this.obs.zIndex = Math.round(1000000 - this.z);
            }
        }

        this.cto = function() {
            var i = this.txt.length;
            while (i--) clearTimeout(this.sto[i]);
        }

        this.click = function() {
            var i = pgal.N;
            while (i--) pgal.O[i].cto();
            if (pgal.S != this) {
                pgal.xt = this.x;
                pgal.yt = this.y;
                pgal.zt = this.z;
                pgal.S  = this;
            } else {
                pgal.S   = 0;
                pgal.zt += 1600;
            }
        }
    }
}

// event handlers
window.onresize = g_resize;

document.onmousemove = function(e) {
    if (window.event) e=window.event;
    pgal.xm = (e.x || e.clientX) - pgal.nx - pgal.nw * .5;
    pgal.ym = (e.y || e.clientY) - pgal.ny - pgal.nh * .5;
}

window.onload = function() {
    g_resize();
    pgal.init();
}
This is most interesting and important part of our gallery. Our photo gallery object (pgal) contain next functions: init, resize and run. During resize we re-saving all current positions of gallery object. In initialization we perform initialization of all main params and objects (images and span text objects). Each photo object (PGObj) have own set of variables, and few main functions – for animation and onclick handling.
Live Demo
download in package
Conclusion
Today we prepared interesting 3d gallery, sure that was interesting to you. If is you were wondering – do not forget to thank us. I would be grateful for your interesting comments. Good luck!
|
I am web developer with huge experience (in web languages and even in system languages). Also I am the founder of current website (and several another). I like to write blogs about web development/design. Feel free to Follow us on Twitter: |


It’s great. Tnx
Sweet. Interestingly the SPAN tag for image description doesn’t show in Chromium, but does in FF4 and Opera 11.10. The code is there in the Inspector, but the contents of the SPAN is removed. Huh?
Truly, JavaScript can do great things. Thanks for this tutorial
2Onyx: I can`t confirm, I checked just now (again) in Chrome (recently downloaded it and install) – so, all working fine, and spans with description too.
You also can install to Chrome plugin – firebug light, which will able to inspect most interesting places
There is a bug, when you click on the image that is already passed but still possible to click on it. After clicking – image description remains HUGE instead of returning to normal.
Mind Blowing Awesome
WooooooooooooooooooooooooooooooW COOOOOOOOOOOOOOOOOOOOOOOL!
Unbelievable that this is the whole code!
Really impressing,
it’s so cool, really I’m looking for this script for my private personal blog because I have thousands of picture to share
PS: if there’s thousands of pictures, this script will run slowly?
Hi Andrey – Do you have an email address where I can write to you about this work and discuss a related project I am involved in? Thanks in advance.
Hi Mark,
I added Contact Us page recently – you can use this